Patterned backgrounds are an all-time classic you can use anywhere from web design to package design. Here’s how to make one in a couple of minutes.
In the world of backgrounds, monochromatic and gradient backgrounds are the absolute favorites. They are easy to pair with any font, work well with all types of content, and don’t take long to create. However, for some types of design, patterned backgrounds work much better. You can never go wrong with a pattern: it can be as vibrant or subtle, as complex or minimalistic, and as densely or sparsely filled with details as you want.
With this step-by-step guide, you can make your own custom patterned background in just a couple of minutes using Photoshop. Here, we’re going to show you how to create rater patterns in Photoshop. If you prefer vectors, check out this tutorial instead.
What you need to get started
- Adobe Photoshop. If you came across this tutorial, chances are high that you already have this app. However, just in case, here’s the download link to the latest version of Adobe Photoshop. You’ll get a free 7-day trial once you install the application.
- Icons8’s Pichon for desktop. It’s a free app containing massive libraries of carefully curated icons, photos, and illustrations. They are all sorted into different styles and categories, so you can create perfectly consistent designs. It works on Windows and macOS and is compatible with Photoshop.
- Icons or other images you need for your pattern. In this tutorial, we went for the Sea life icons from our Color icon style. You can download them for free as PNGs of any size up to 100×100 px.
Creating your own pattern in Photoshop
It only takes 8 quick and easy steps. Get your Photoshop and Pichon ready and let’s begin.
Create a new file
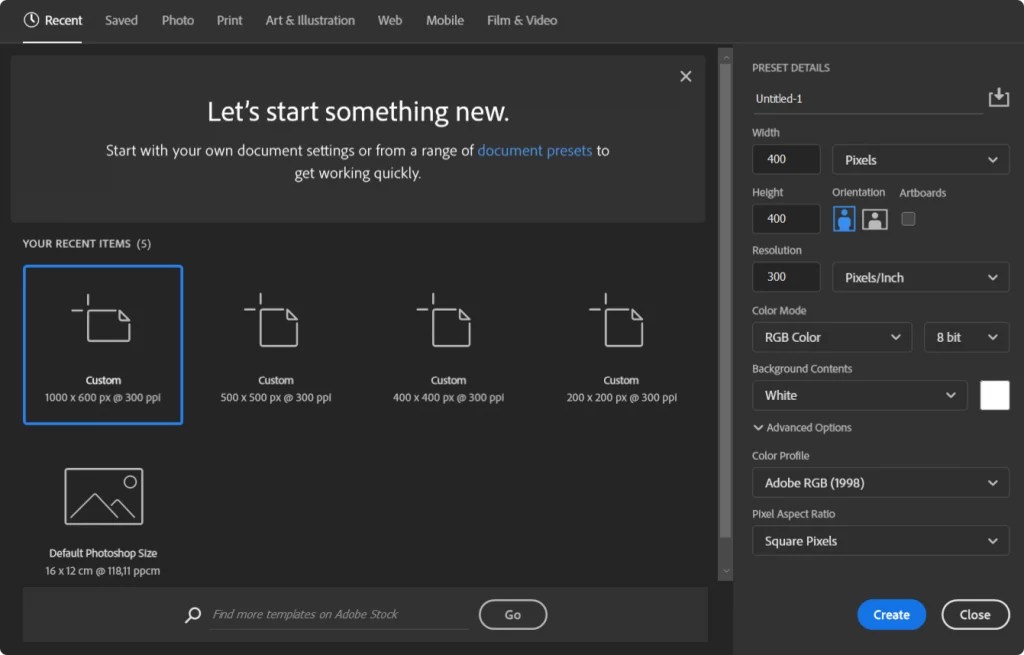
Create a new file of any size with equal width and height. We recommend that you go for a size that is at least 4x bigger than the size of your icons. That is because if you choose a smaller size, the pattern is going to end up crammed and messy. If you want more space between the elements of your pattern, experiment with even bigger file sizes.
In our case, since we downloaded 100×100 pixel icons, we created a 400×400 pixel file as a base for our pattern.
Add the images
Open Pichon next to your Photoshop canvas and import the icons. Select the ones you need and simply drag-and-drop them onto the canvas. We went for a sea life-themed pattern and picked a Crab, a Fish, a Clown fish, and a Seahorse.
If you decide to use monochromatic icons, you might need them in different colors. Here’s how to recolor PNG icons in Photoshop.
Once you have all the images on the canvas, click “Done” for each of them. It should look a bit messy after you import them. This is completely fine as long as you see each image as a separate layer in the Layers panel.
Set up the first layer
Our main instrument for creating a pattern in Photoshop is the Offset layer filter. To open it, click Filter → Other → Offset.
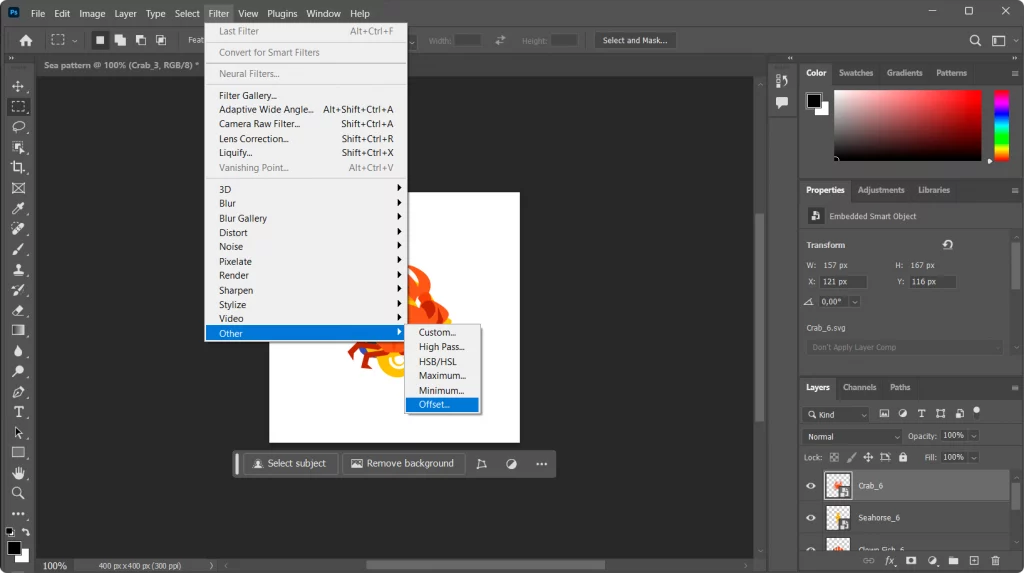
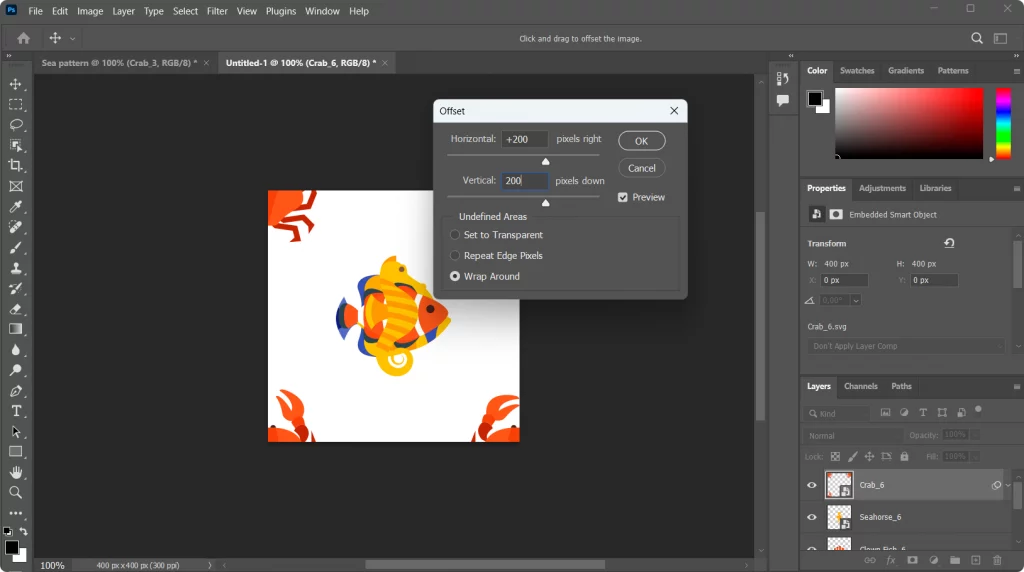
There, you need to set both the vertical and the horizontal offset to 200 pixels. We recommend choosing the offset that is half the size of your base layer. Since we chose ours to be 400×400 pixels in the first step, we are going with 200 pixels here. If your file size is, say, 900×900 pixels, the offset should be 450 pixels for a perfectly symmetrical pattern. Also, make sure the Wrap Around option here.
Set up the second layer
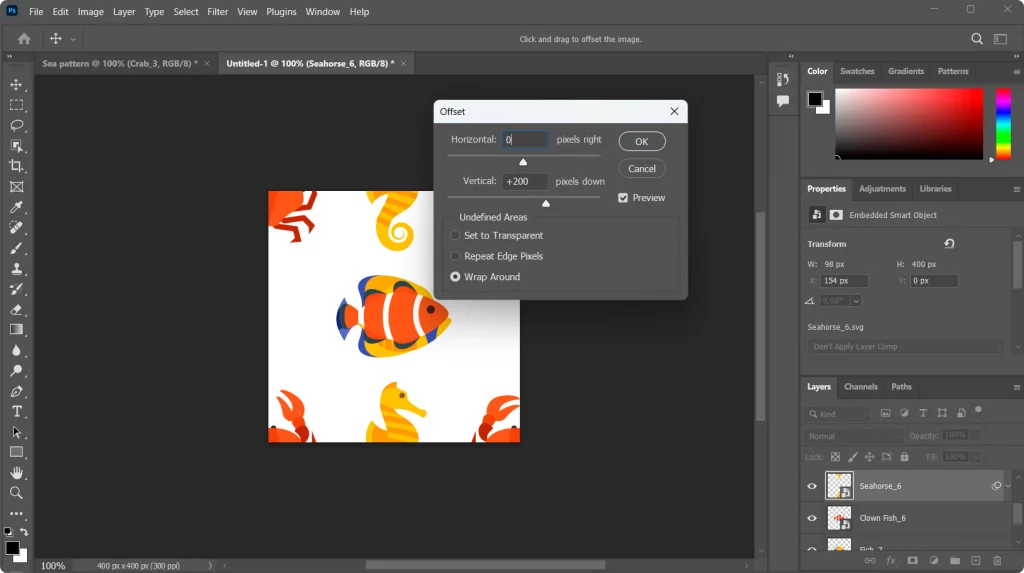
Select the next layer in the Layers panel and open Filter → Other → Offset again. This time, we need to leave the vertical offset at 200 and switch the horizontal offset back to 0. Wrap Around has to be activated at all times.
Set up the third layer
Pick the third layer and go to Offset settings one more time. Now you need to do the opposite and set the vertical offset to 0 and bring the horizontal offset back to 200.
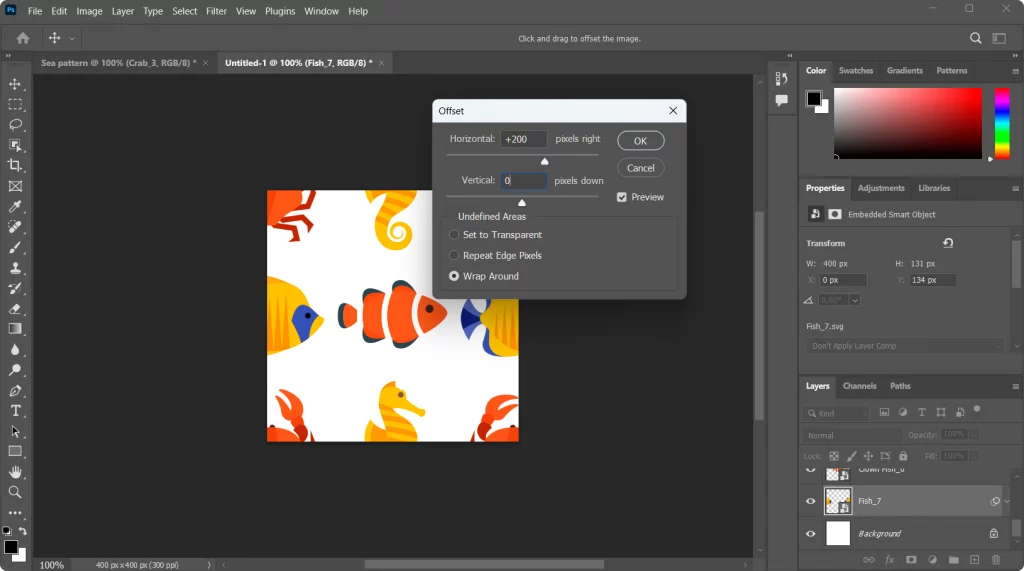
Voilà, this is the final pattern and we’re almost done! We don’t need to offset the fourth layer because we already have it right in the middle.
Merge the layers
Select all the layers except Background in the Layers panel and press Ctrl+E (Cmd+E). The layers should merge into one, and you should be able to see your pattern in the layer preview.
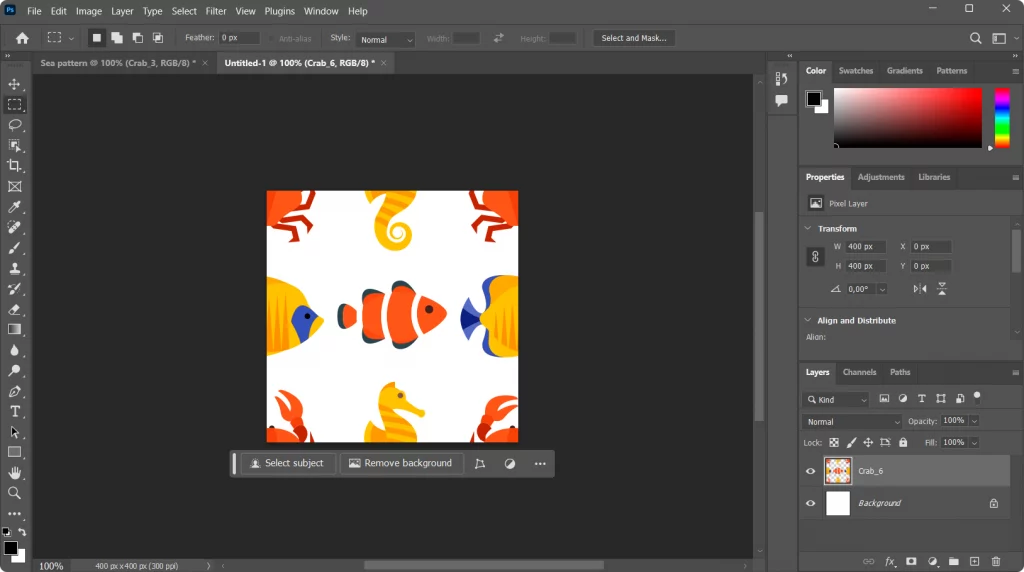
Save your pattern
First, select all your layers by pressing Ctrl+A (Cmd+A). Then click Edit → Define Pattern.
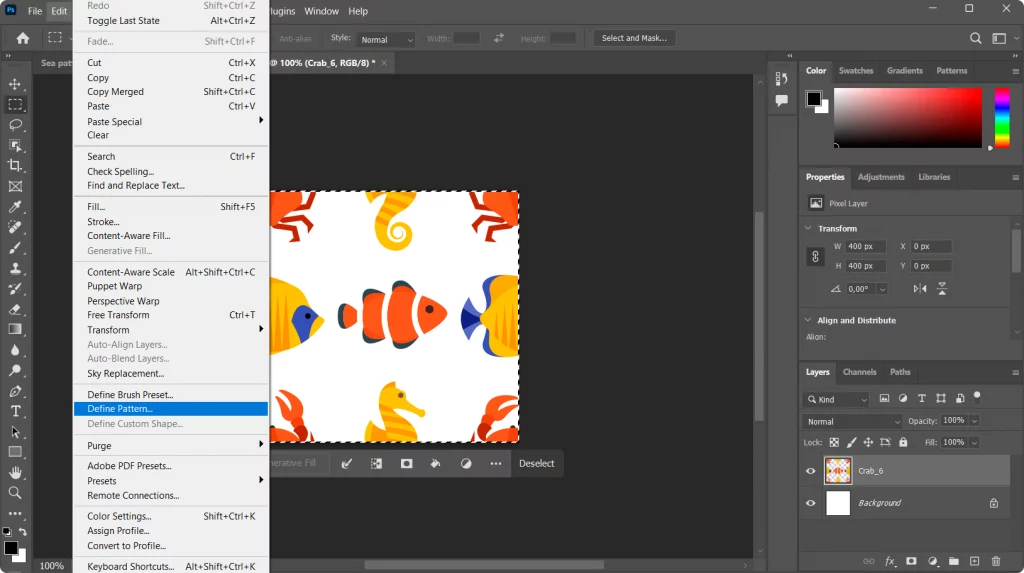
Name it and press OK. All done, now you can apply the pattern to your designs.
How to apply the pattern
We came all this way to have a custom pattern for backgrounds, so let’s make one.
Create a new file
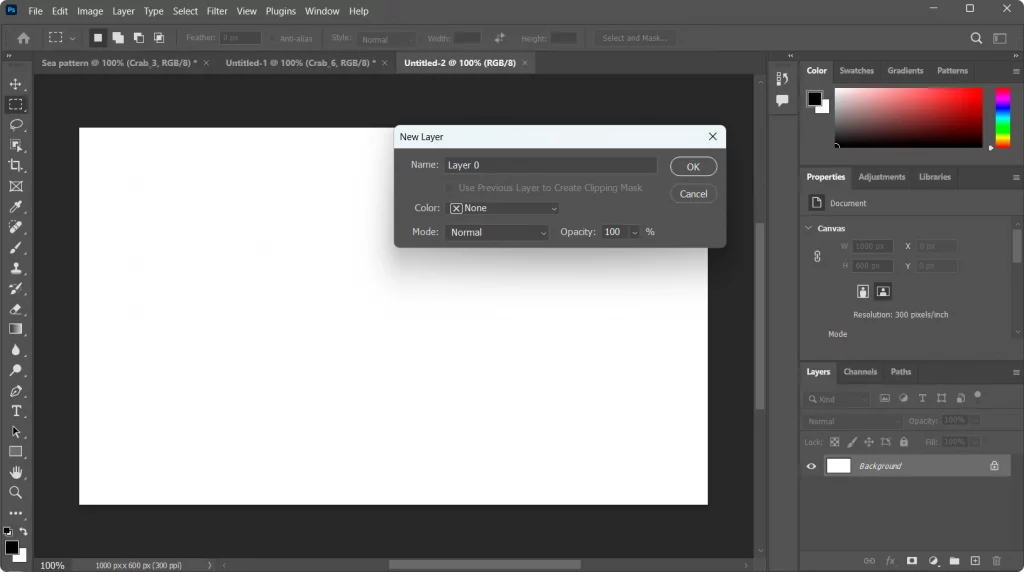
Make sure your new file is bigger than the one you used to create the pattern. Otherwise, you won’t be able to see the result. We went for 1000×600 px.
Once your new canvas is ready, double-click on the Background in the Layers panel. In the pop-up window, click OK without tweaking any settings.
Apply pattern overlay
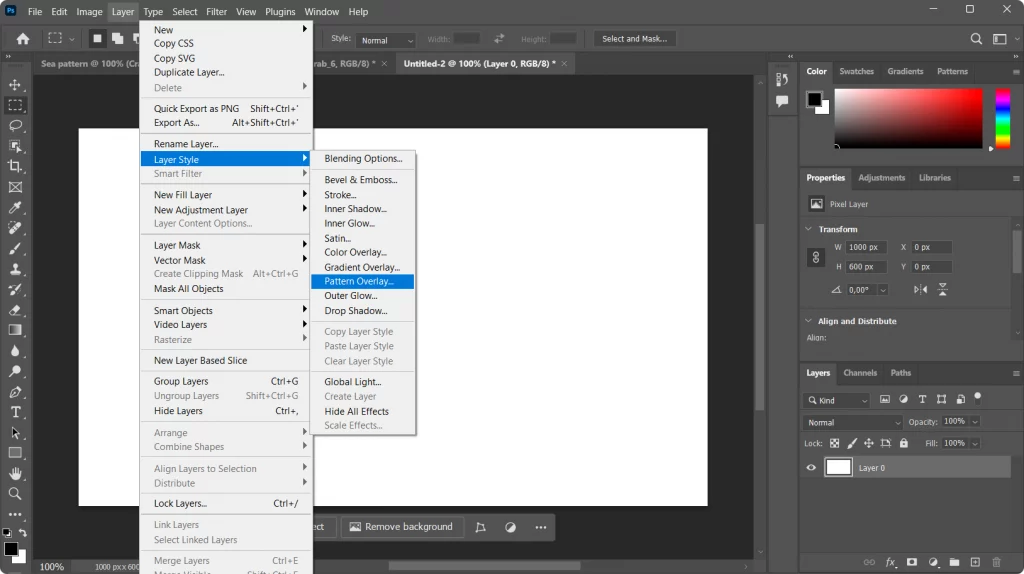
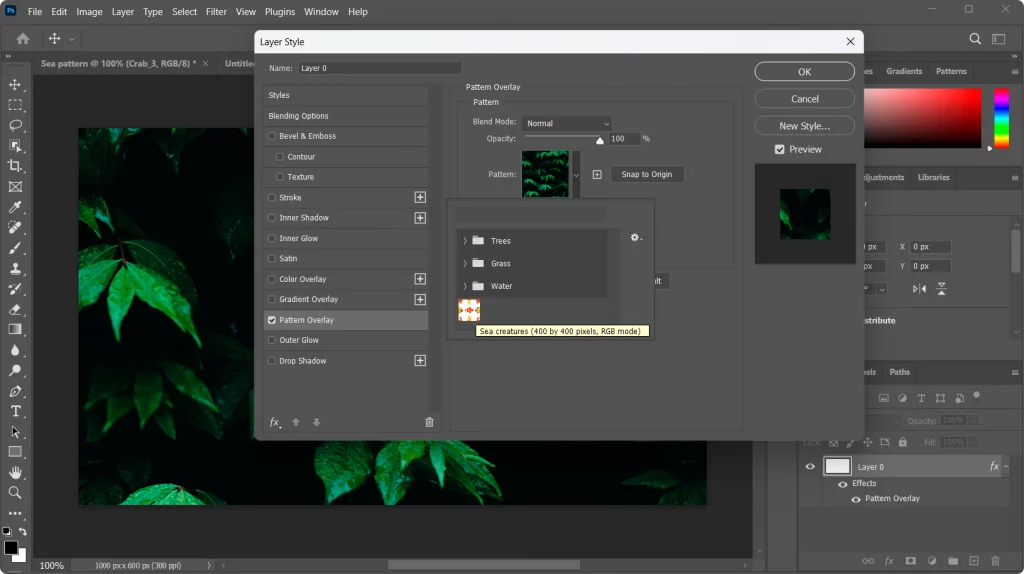
Go to Layer → Layer Style → Pattern Overlay. Select your newly created pattern in the pop-up window and click OK.
Enjoy the pattern
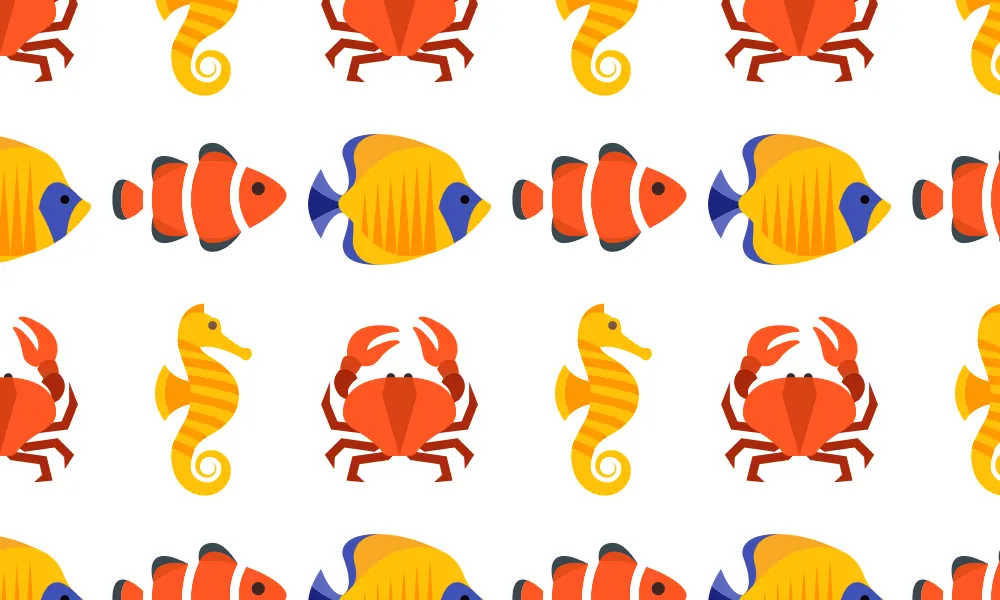
Remember what we said about the size of your canvas for the pattern at the beginning of the tutorial? The bigger your canvas is compared to the size of the images, the looser your pattern is going to be. Here is our final pattern with 100×100 pixel icons on a 400×400 pixel canvas with a 200 pixel offset.
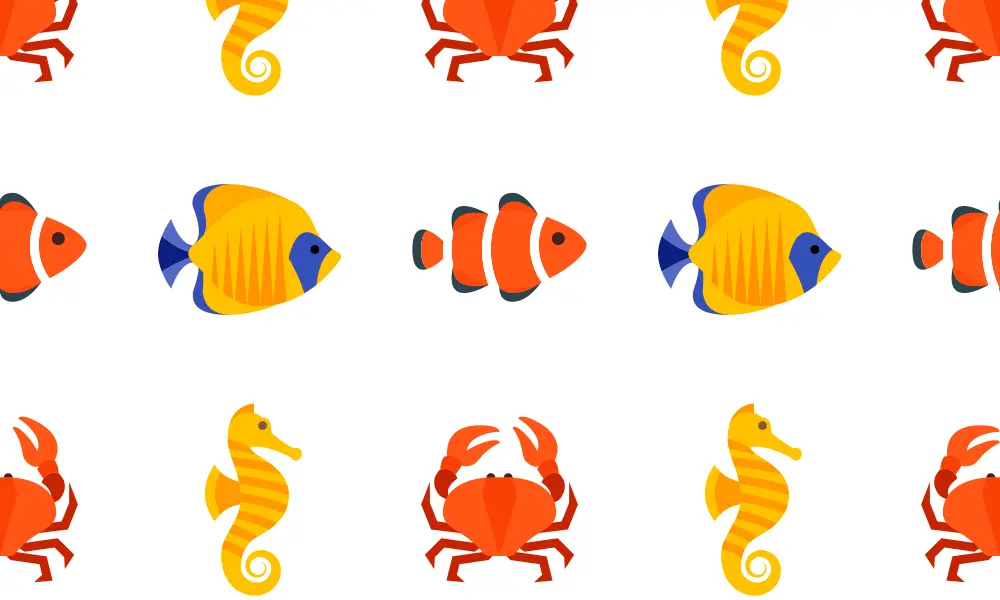
And here is that same pattern created with those same 100×100 pixel icons on a 500×500 pixel canvas with a 250 pixel offset respectively.
Sources with textures for Photoshop
Textures are the easiest way to create a clean, cohesive patterned background in Photoshop. There are plenty of nature-inspired textures that imitate wood, stone, water, and other materials. You can find entire sets of free Photoshop textures online: for example, FixThePhoto has hundreds of free textures. There are also lots of free textures on Adobe Stock.
Further Reading
- Creating a Christmas Background Pattern in Adobe Illustrator
- How to Recolor a PNG Icon in Photoshop
- How to remove background from picture in Photoshop
- How to remove white background in Photoshop
- Keeping it simple: how to use minimal backgrounds in UI design
Try free tools for creators by the Icons8 team
Also, get the lists of free vector software and free photo editing software.