Unlock the power of Procreate to create seamless, eye-catching illustrations with no distracting backgrounds.
In this post, we’ll cover how to remove background in Procreate using:
- Automatic Selection tool
- Freehand Selection tool
- Icons8 Background Remover—a hassle-free option
How to remove background from picture with the Automatic Selection tool
As the name suggests, the Automatic Selection tool automatically selects and remove background in Procreate. But sometimes, you may need to make manual adjustments, as the selection may not always be accurate.
- Tap on the Selection tool in the top-left menu (S-shape icon).
- On the main menu, select Automatic.
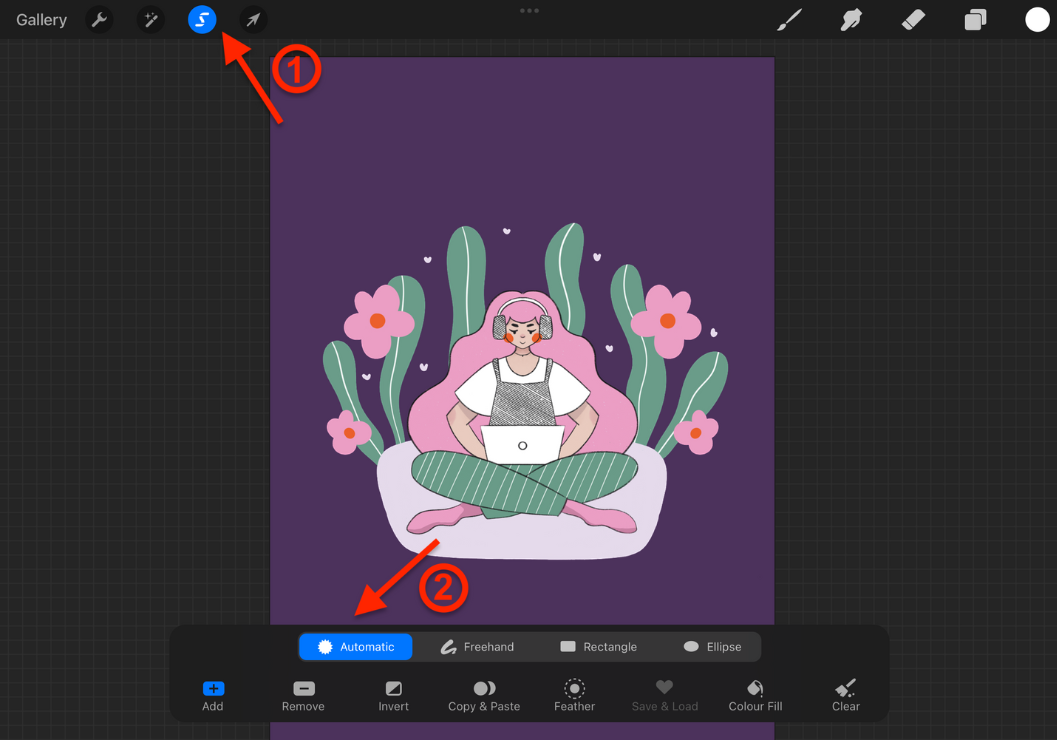
- Tap on any part of the background that you want to remove. If the selection isn’t accurate, tap on the screen and drag around the object you want to cut out.
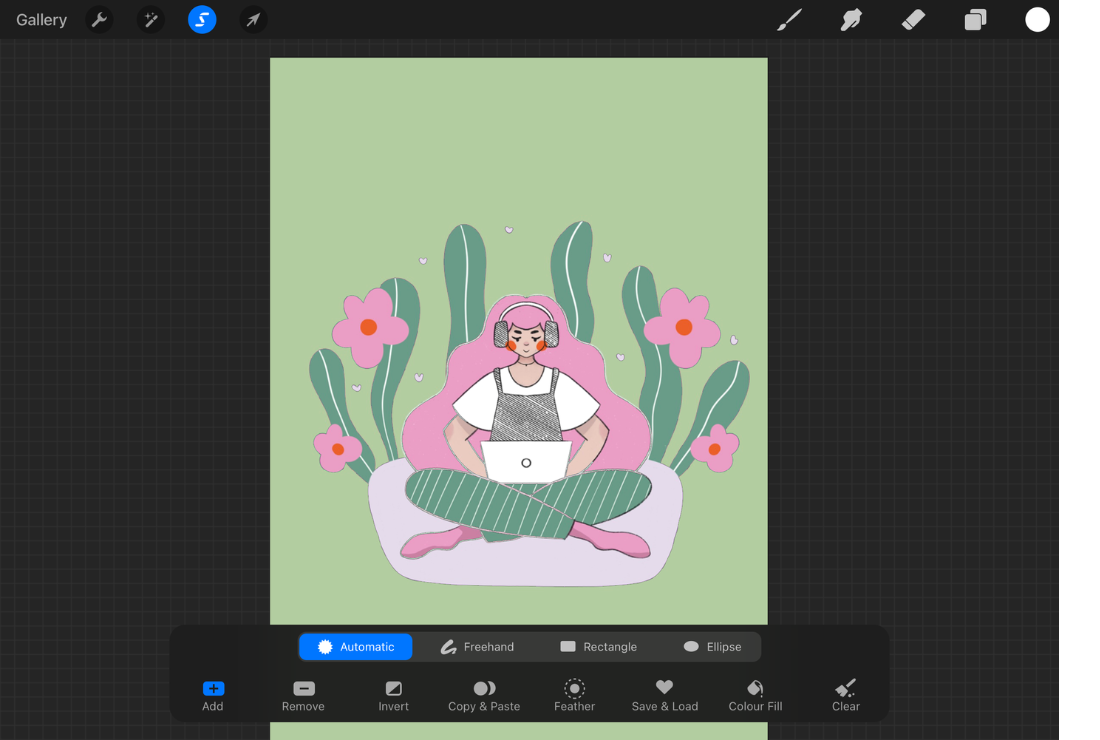
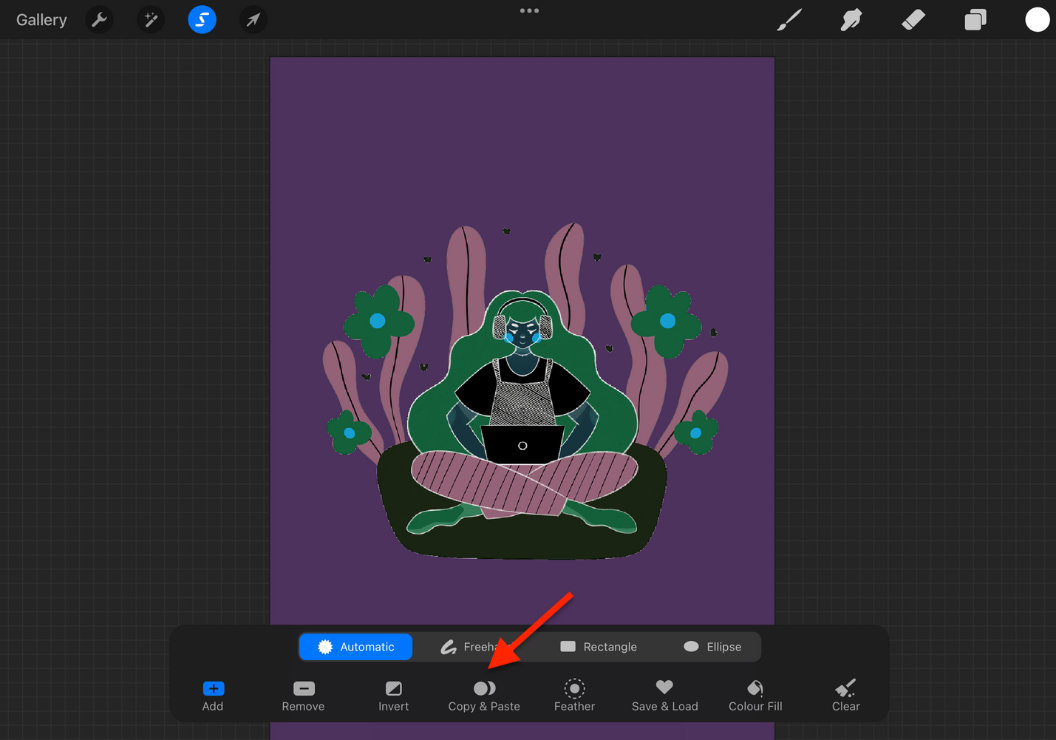
- Click Invert, then click Copy & Paste. Procreate will automatically create a new layer with your cutout.
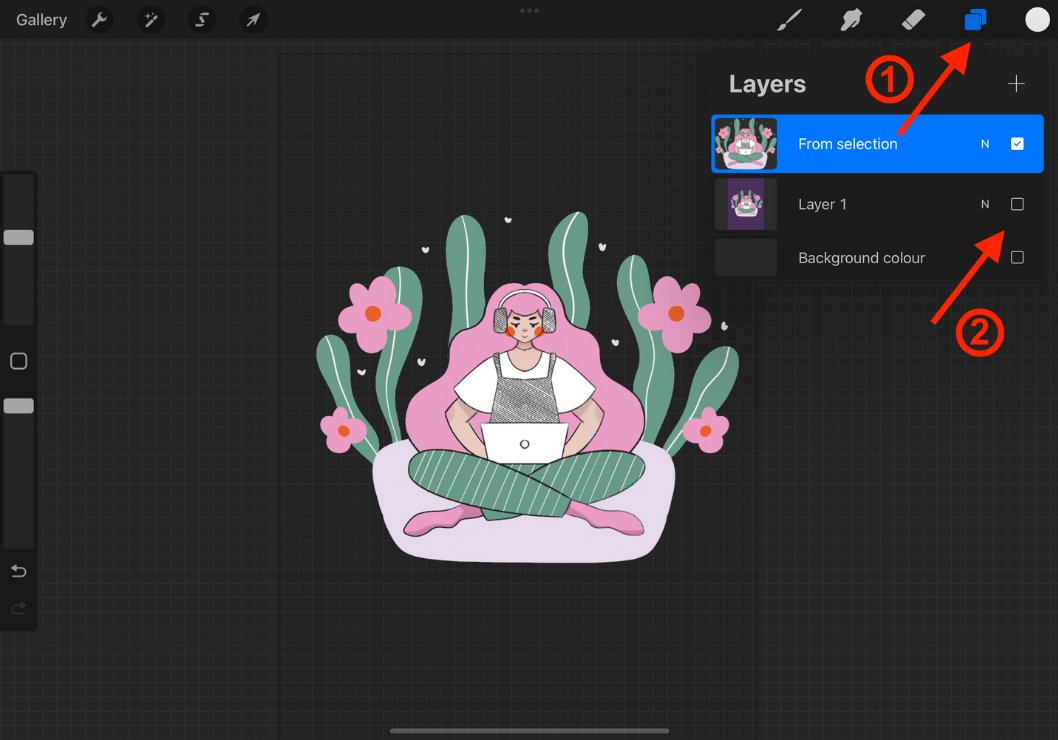
- Tap on the Layers icon in the top-right menu (looks like a pair of overlapping squares). And deselect your original image and background layer by tapping on the square checkboxes, or delete them by swapping left and clicking Clear.
- Save your image in a PNG format.
How to remove the background of a picture with the Freehand Selection tool
Sometimes Automatic Selection tool struggles with complex objects. In these cases, the Freehand Selection Tool can be a better option. It allows you to manually trace around the object you want to cut out.
- Tap on the Selection tool in the top-left menu (S-shape icon).
- On the main menu, select Freehand.
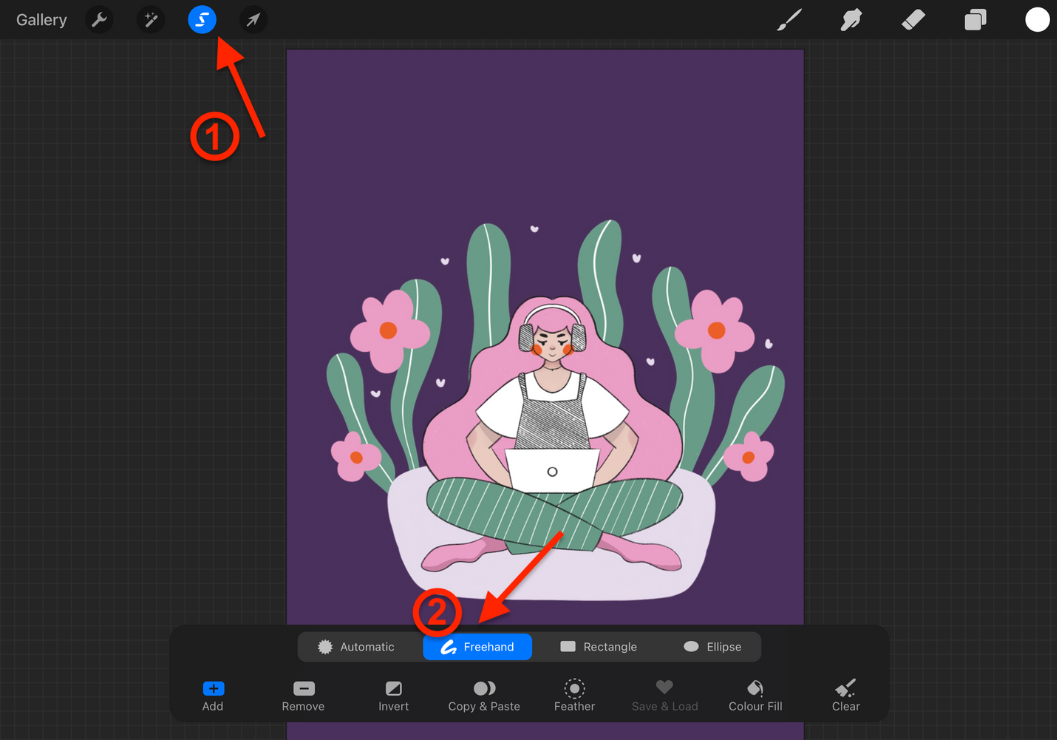
- Trace along the edges of the subject you want to cut out. To undo the latest trace movement and step back, tap two fingers on the canvas.
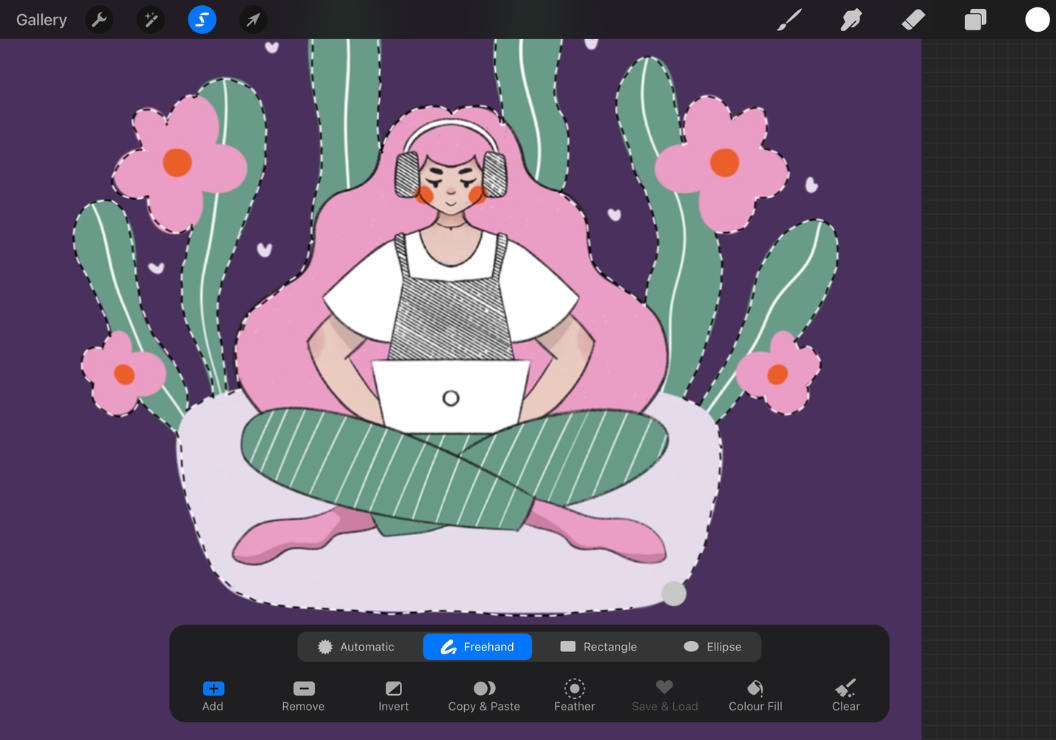
- Close the path by clicking on the gray point.
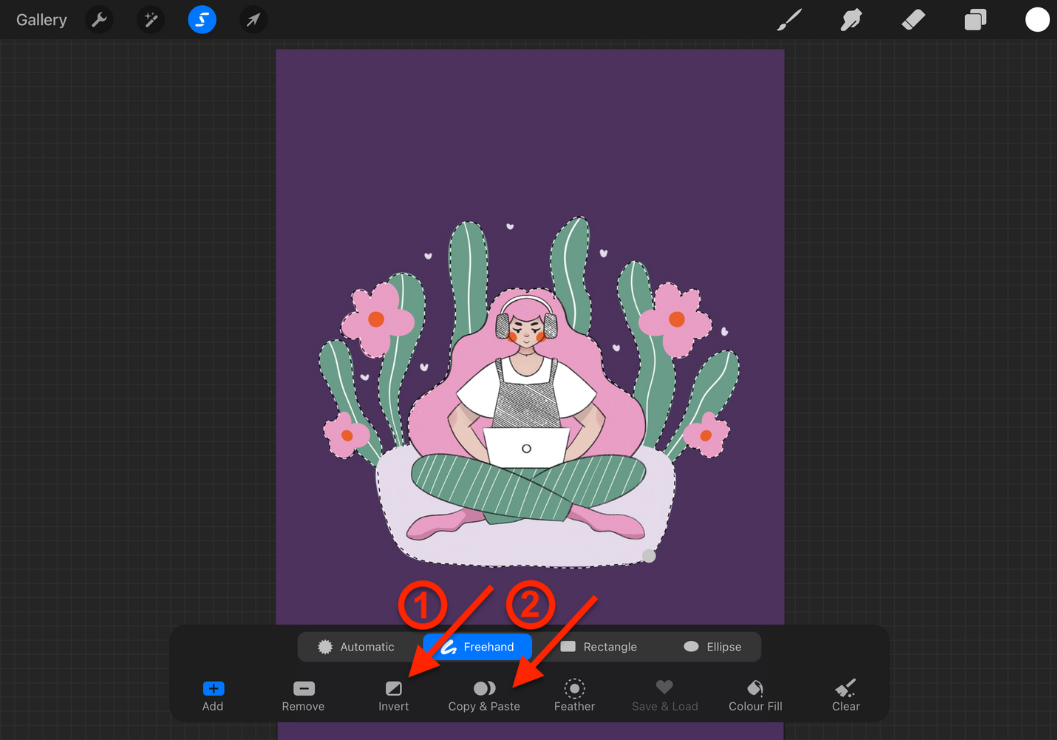
- Click Invert, then click Copy & Paste. Procreate will automatically create a new layer with your cutout.
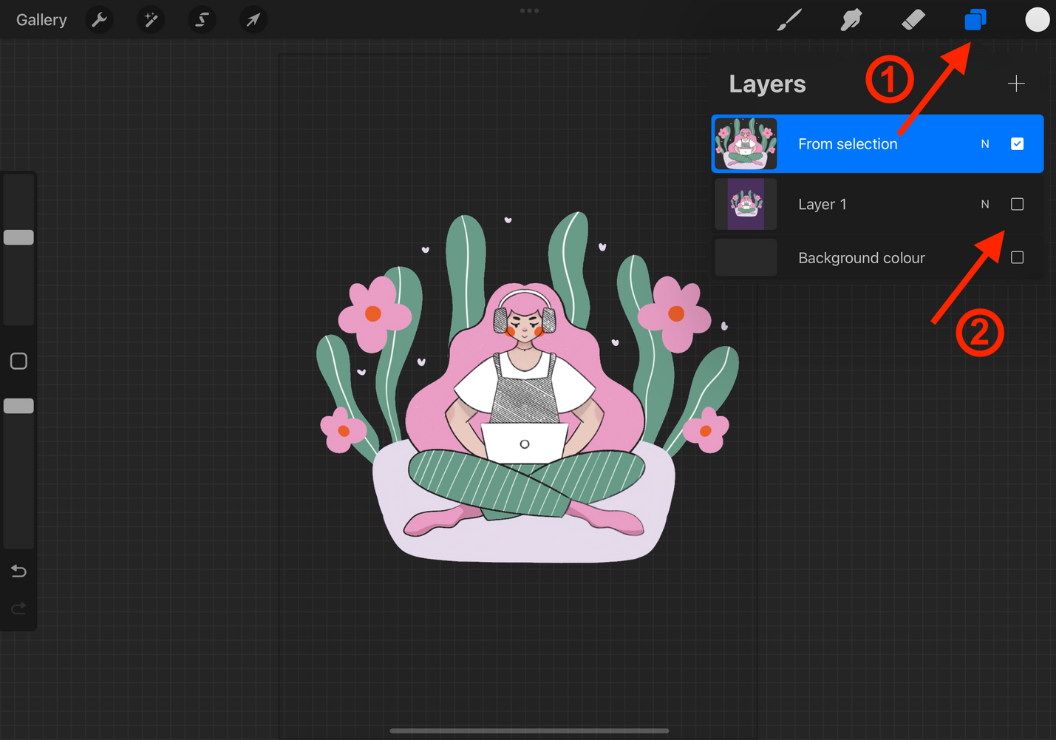
- Tap on the Layers icon in the top-right menu (looks like a pair of overlapping squares). Deselect your original image and background layer by tapping on the square checkboxes to get the transparent background, or delete them by swapping left and clicking Clear.
- Save your image in a PNG format.
How to remove image background with Icons8 Background Remover
Procreate is all about digital sketches and illustrations. So, it struggles with image manipulations, like background removal, resulting in non-accurate results. Additionally, mastering Procreate background remover tools requires time and practice. It’s not a 5-minutes job.
That’s where advanced tools like Icons8 Background Remover come into play. It automatically removes background from images with the help of AI. A few clicks and it’s done.
- Go to the Icons8 Background Remover and upload an image you want to edit.
- The tool will automatically remove its background.
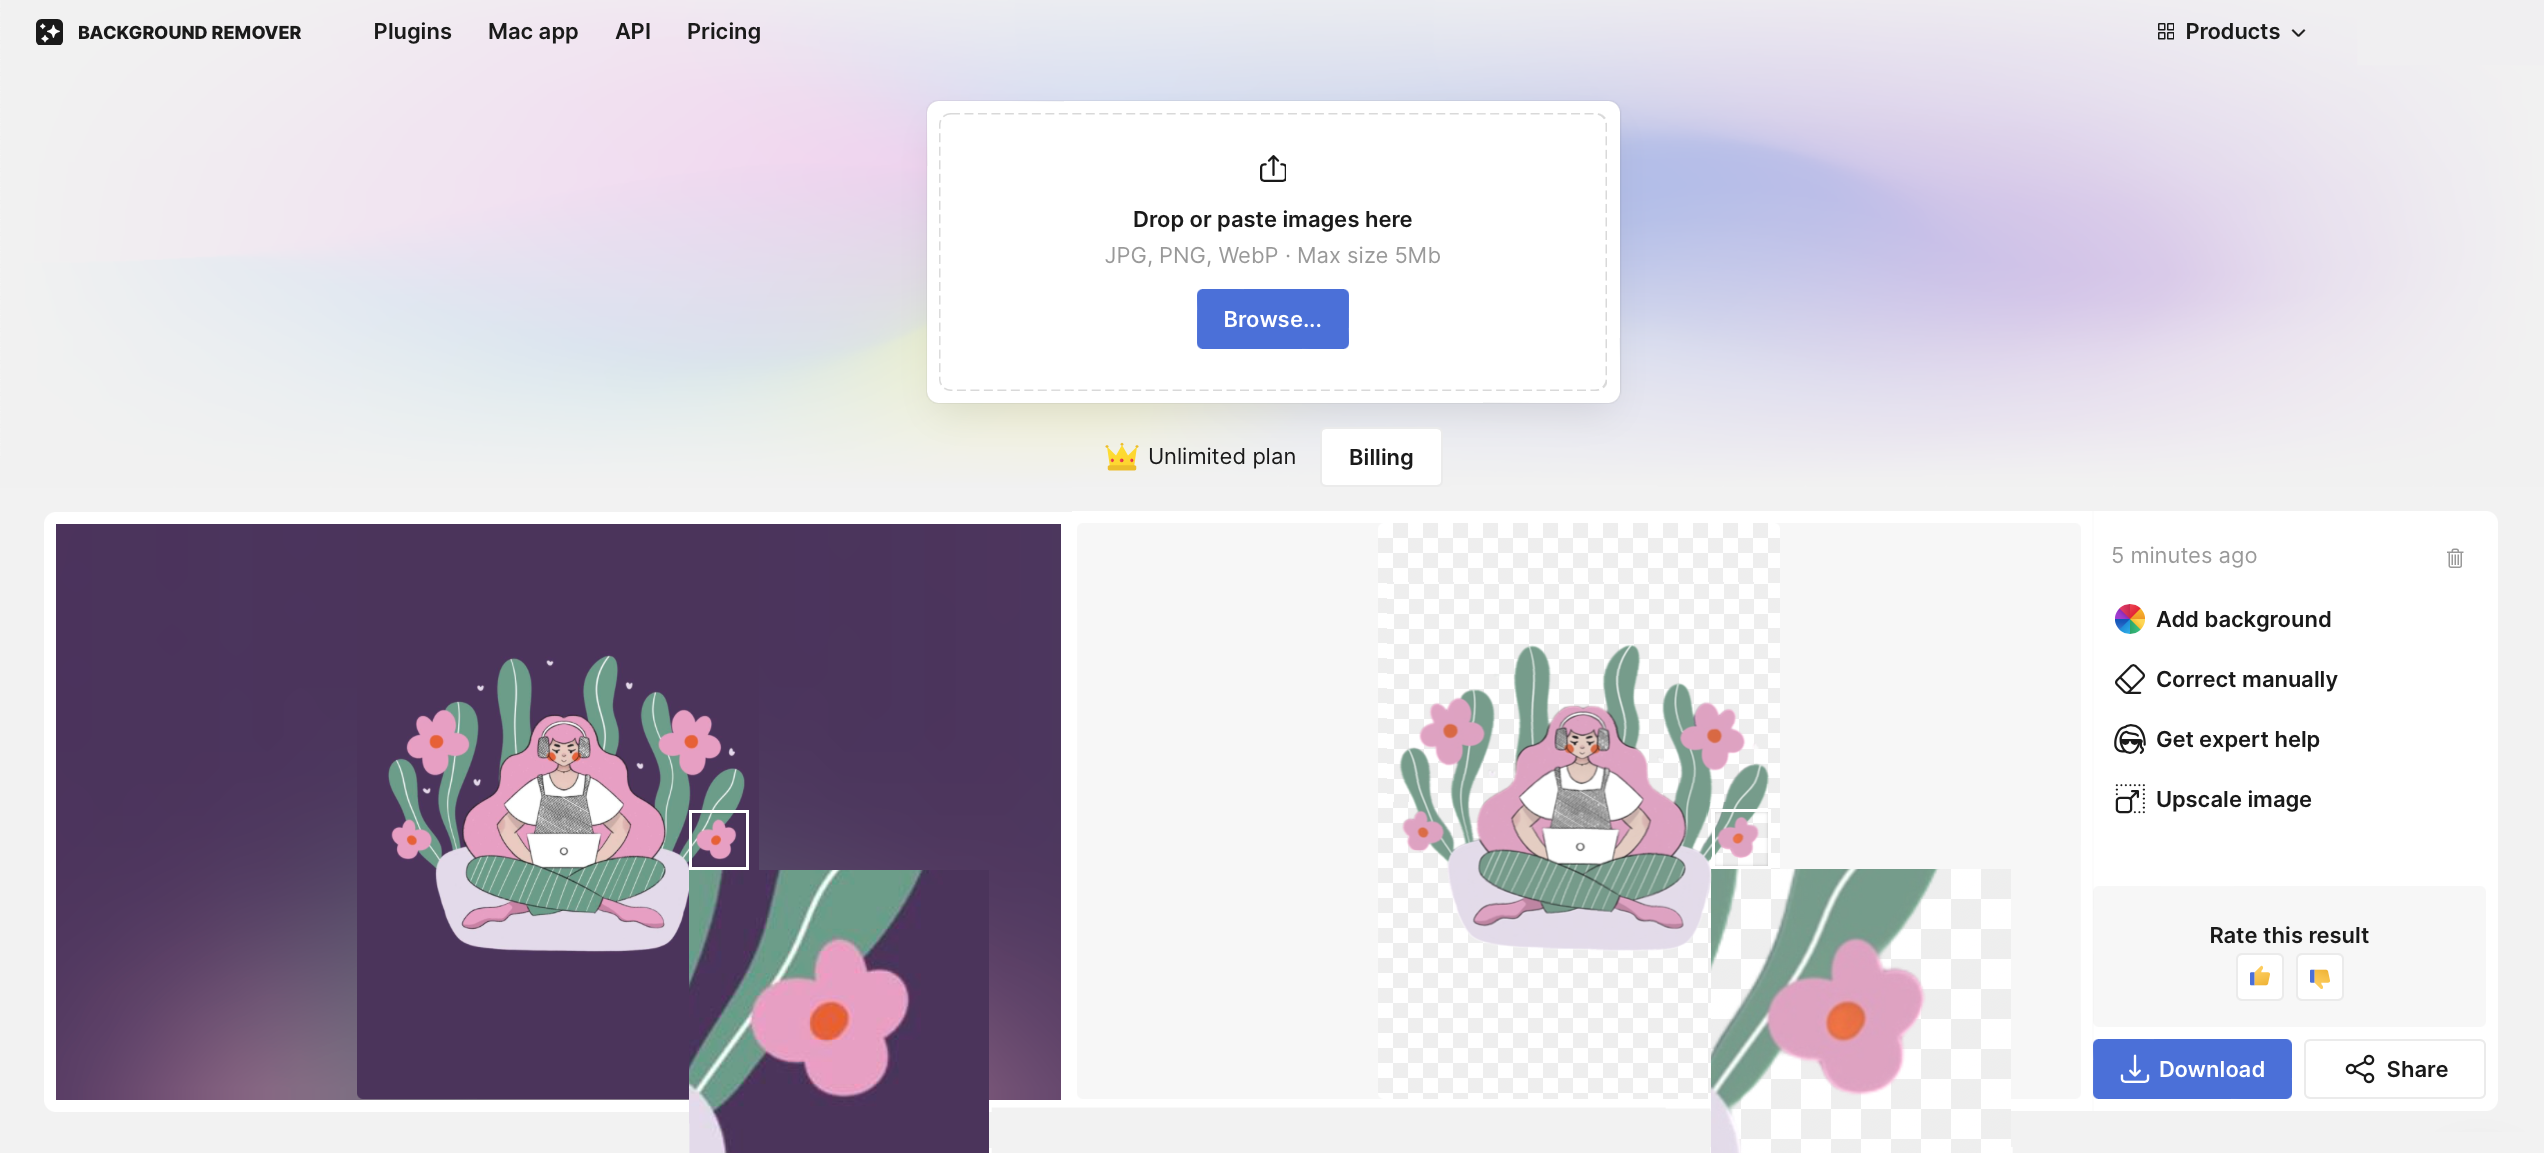
- Download your image.
So, which tool to choose? Procreate is your go-to when you need to get rid of background just for fun, or personal use. For pro-looking results, Icons8 Background Remover is your best bet.
Also, check 8 best free drawing software, and top 5 background removal services.
About the author
Willow Chen. Digital illustrator who breathes life into brand concepts through distinctive character design. Specializes in translating complex ideas into visual stories, brings a signature style to commercial work, and champions illustration as a strategic communication tool rather than mere decoration.