Add a mobile app project to your portfolio and get familiar with all the basic features of Lunacy. A step-by-step tutorial for beginners. Repeat and learn.
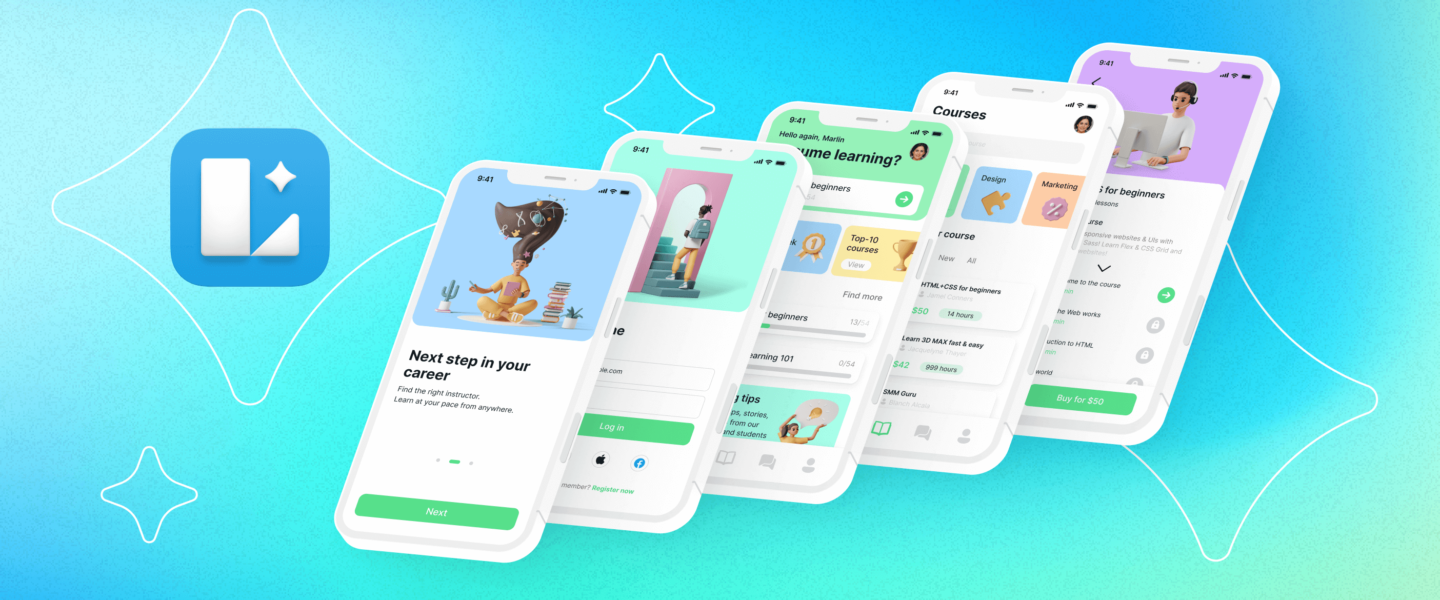
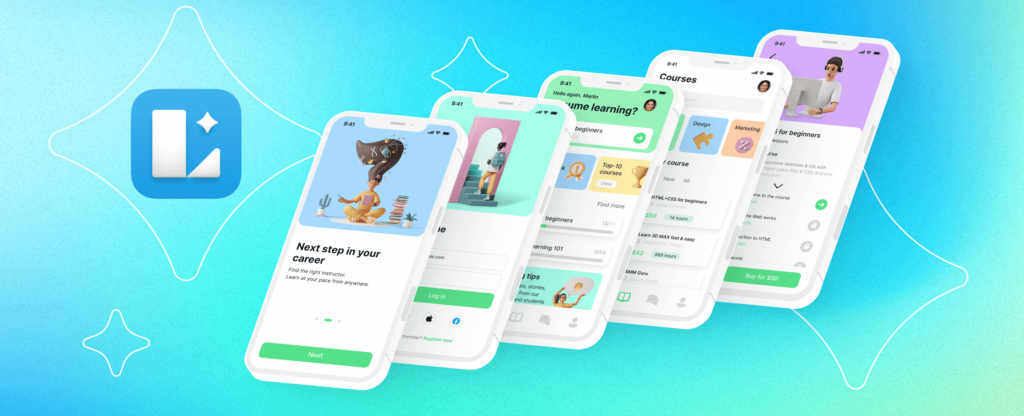
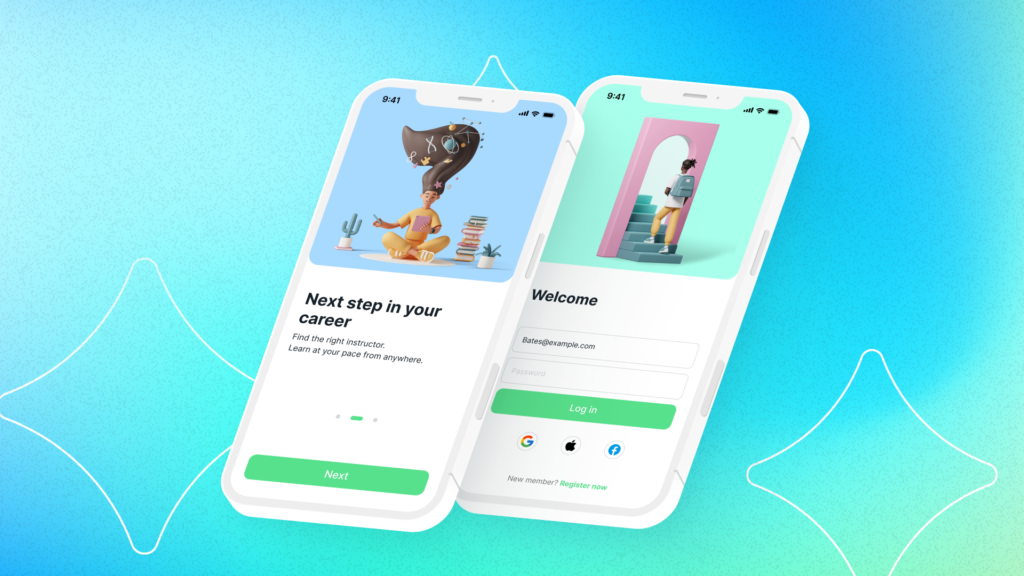
Throughout this tutorial, we’ll create five basic views of an e-learning app with all the essential UI elements used in all types of mobile apps. You’ll learn how to work with components, color variables, styles, and other time-saving things in Lunacy. And here is what your design will look like when you get to the end.
This is part 1 of 4 of the tutorial. The other parts are available on YouTube by the following links: Part 2, Part 3, Part 4.
We’ll start with creating an onboarding view and a sign up form. You’ll work with shapes, create styles and color variables.
Create a new document.
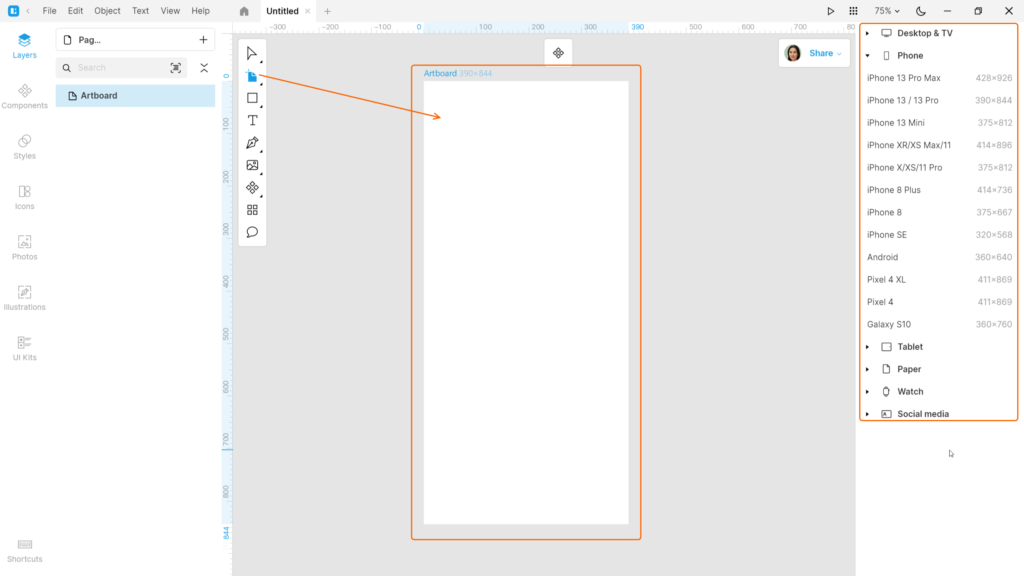
Create an artboard. Enable the Artboard tool (A) and simply click over the canvas to use the default iPhone 13 preset. Or select any other preset from the list.
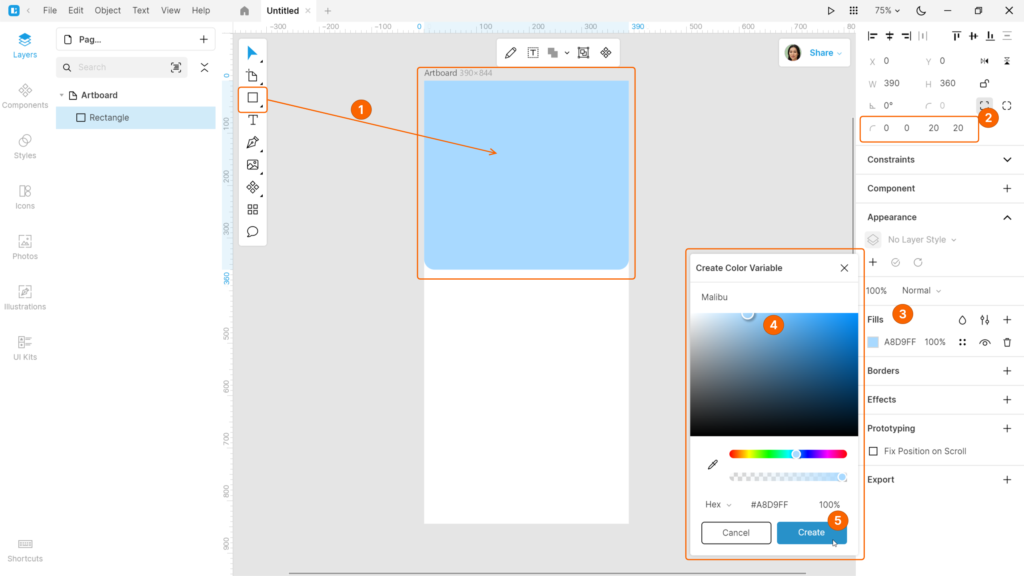
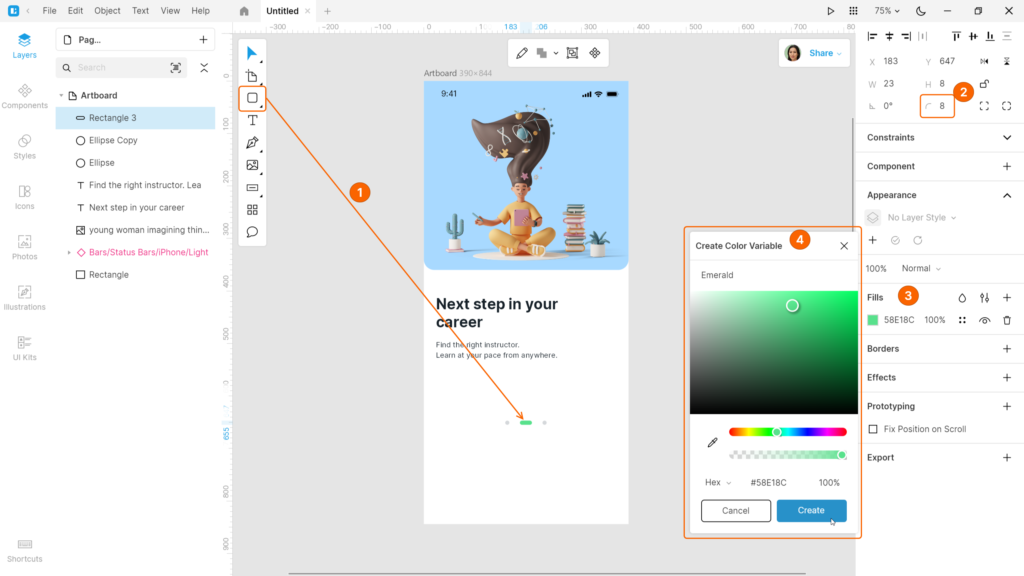
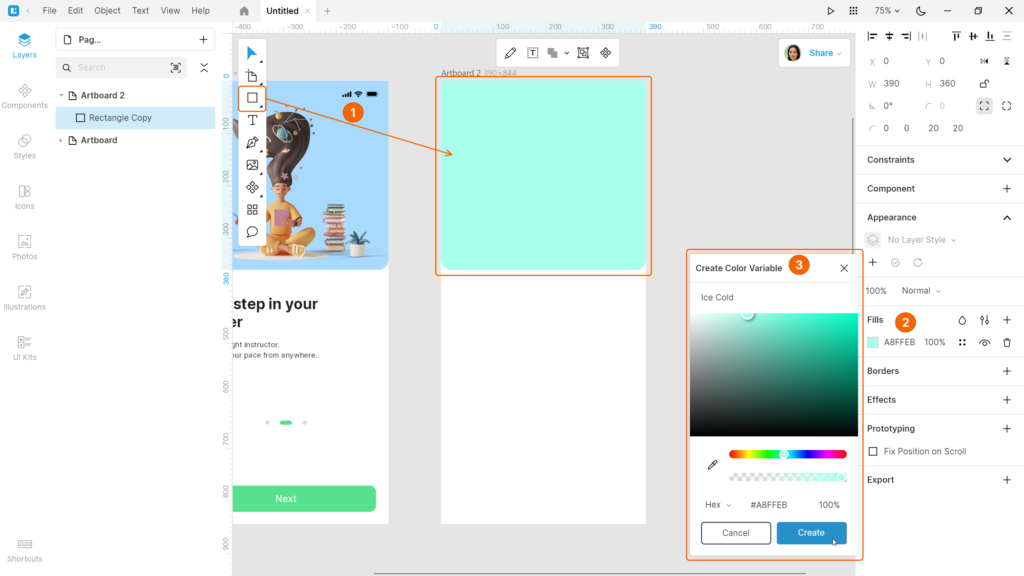
Create a rectangle with the following settings: size 390*360px, fill #BABFFF, and corner radius 20px for lower corners.
Create a color variable through the Color Picker. Lunacy will automatically generate the variable’s name, but you can change anytime.
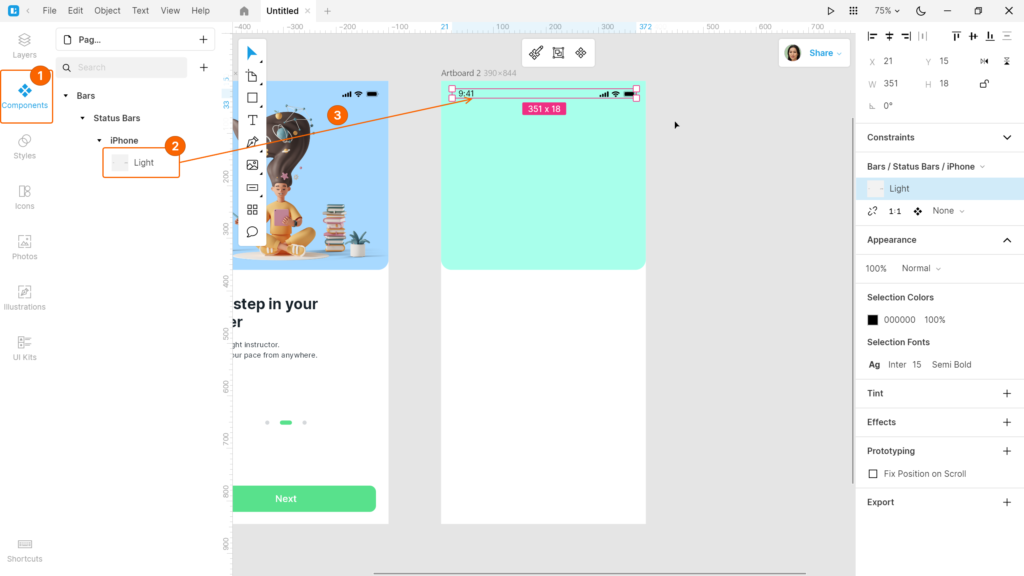
Add the status bar from the UI kits. Go to Apple iOS UI kit > Bars > Status bar > iPhone > Light and drag the bar component onto the canvas.

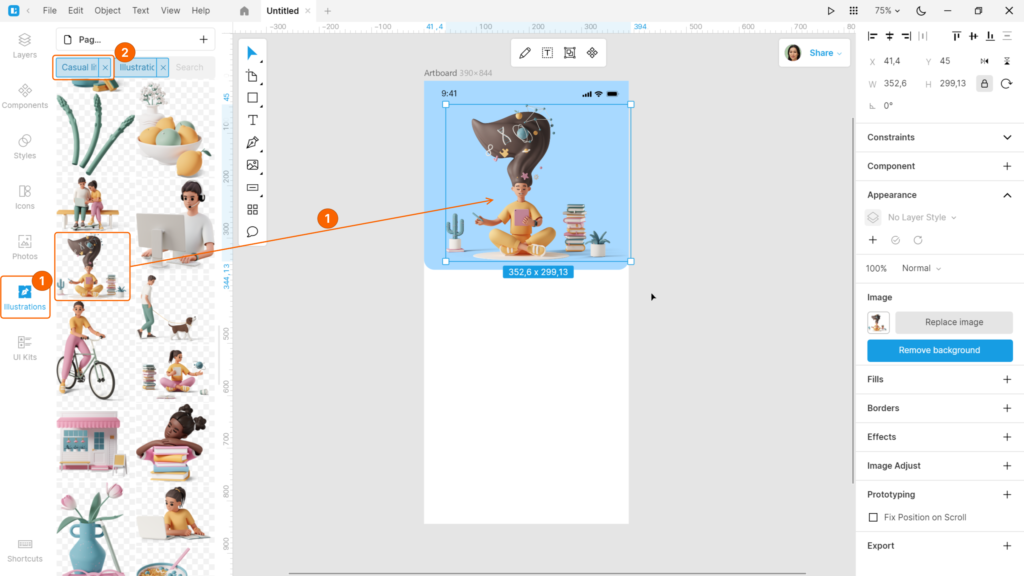
Switch to the Illustrations tab and place an illustration over the blue rectangle. I used illustrations from the Casual life 3D pack.
Enable the Text tool (T) and add a text block below the rectangle. I used the following text settings: Inter Bold, size 28, color #17232D. Create the second color variable (Shark).
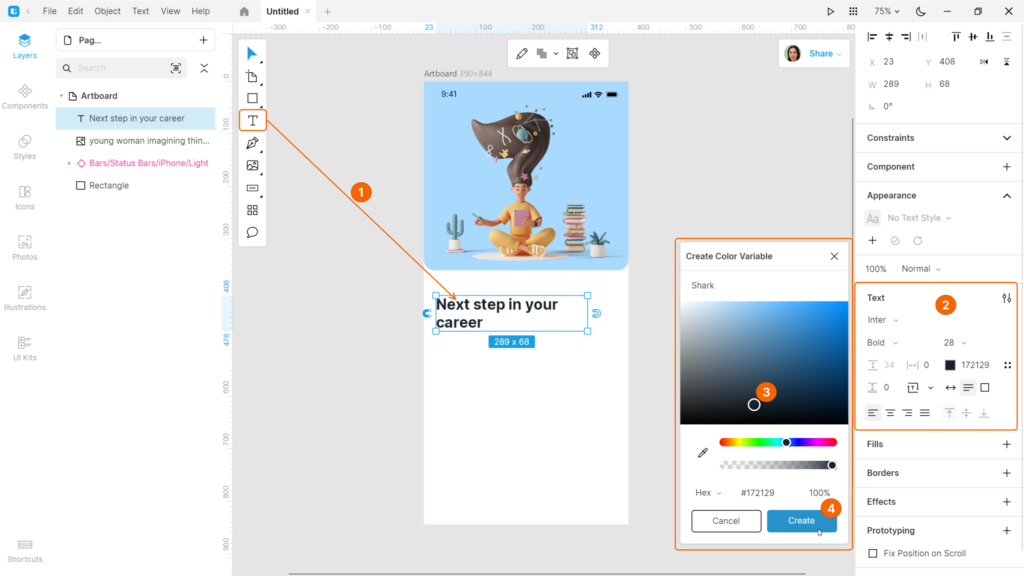
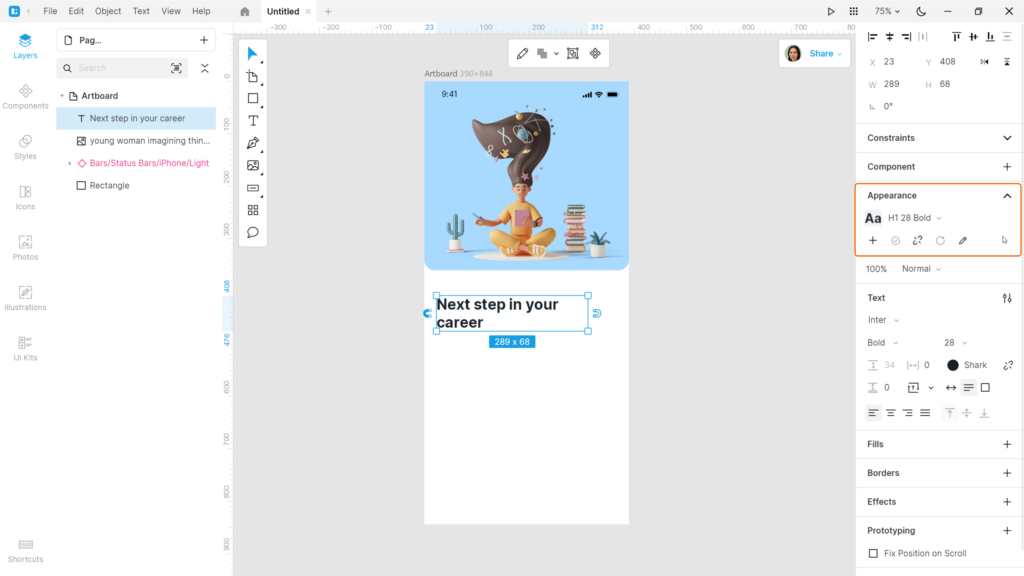
Create the first text style to re-use these text settings later and give it a name. For example, H1 28 Bold, where
- H1 is the level 1 heading in our design
- 28 is the font size
- Bold is the font weight.
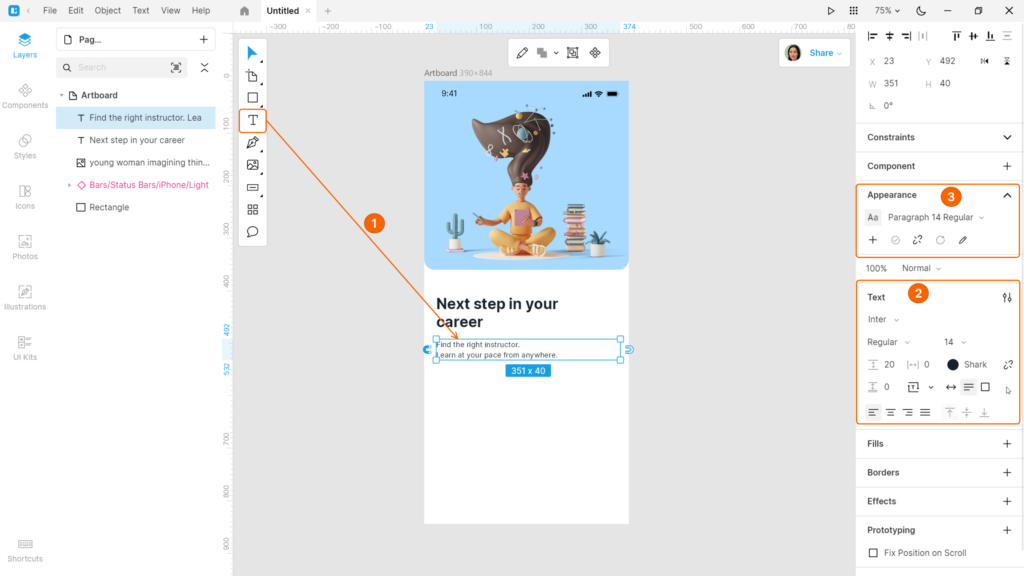
Add another text block below: Inter Regular, size 14, color variable Shark.
And create the second text style with the name Paragraph 14 Regular.
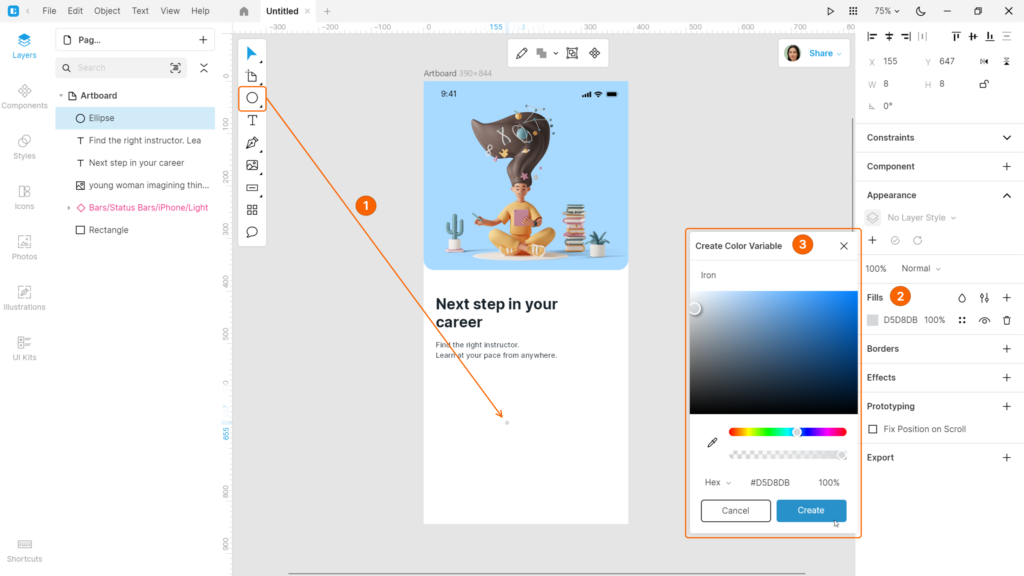
Now, let’s create a current page indicator.
For this, we’ll use two ellipses and a rounded rectangle. Create the first ellipse with the following settings: size 8*8 px, color #CFD3D6. Save the color as a color variable (Iron).
Create a rounded rectangle with the following settings: size 23*8 px, corner radius 5, color #53DF7D, color variable Pastel Green.
Duplicate the first ellipse.
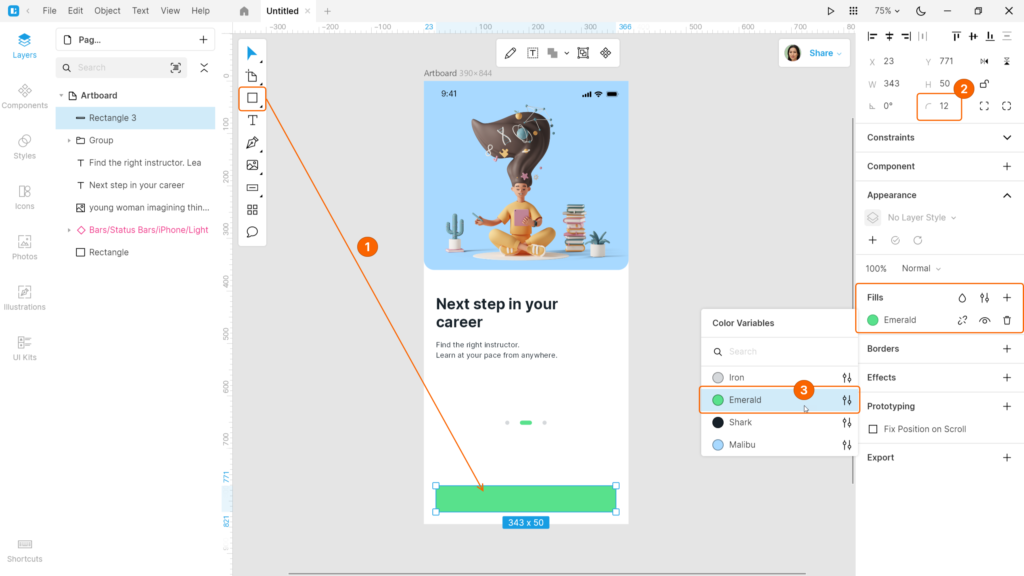
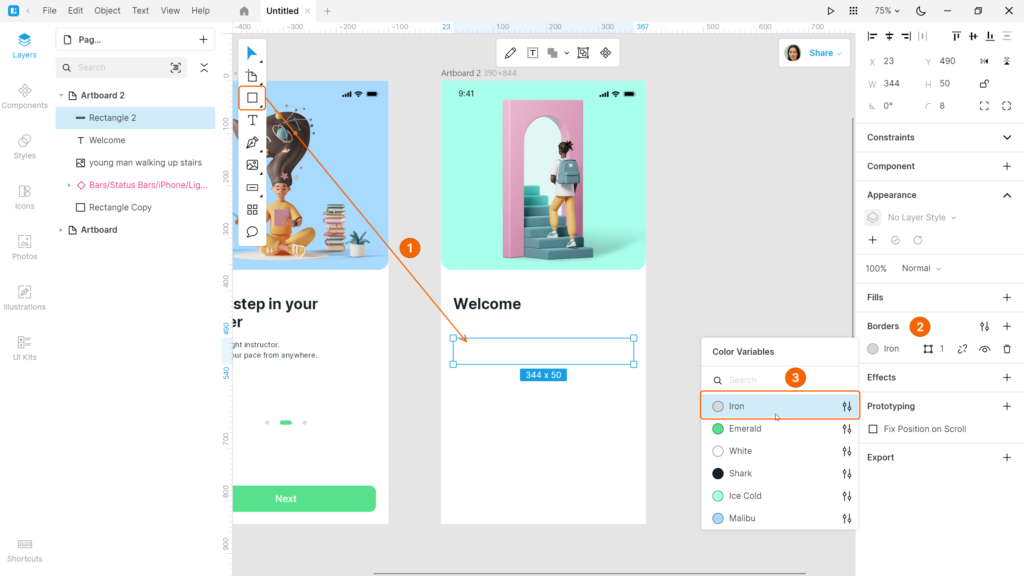
Now, we’ll create a button. Add a rectangle with the following settings: size 344*50 px, corner radius 12, color variable Pastel Green.
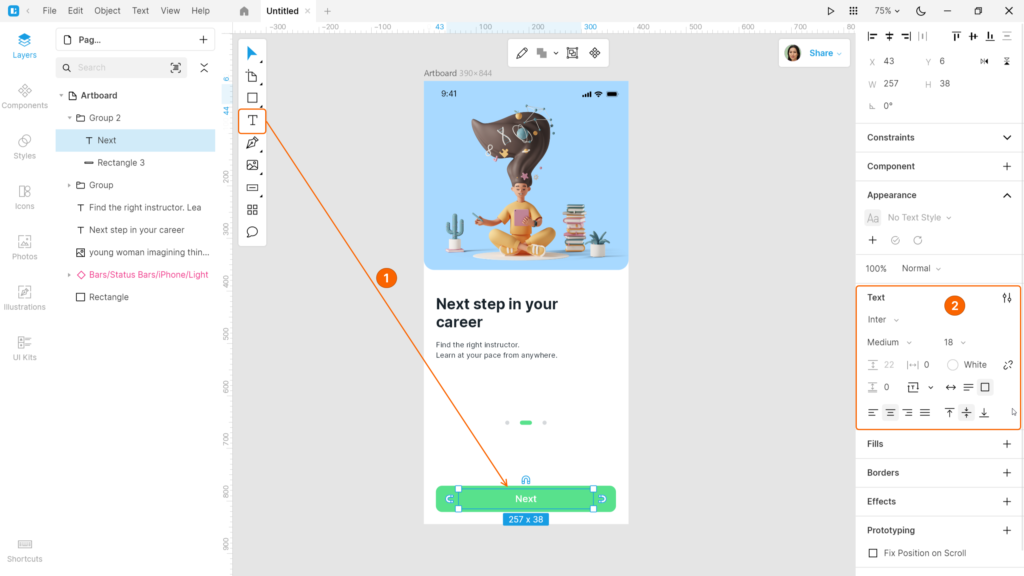
With the rectangle selected, enable the Text tool (T). The text block automatically groups with the rectangle and aligns with the center of the shape. The text settings are as follows: Inter Medium, size 18, color #FFFFFF. Create one more color variable (White).
The first view is ready.
Let’s create another one. Add a new artboard.
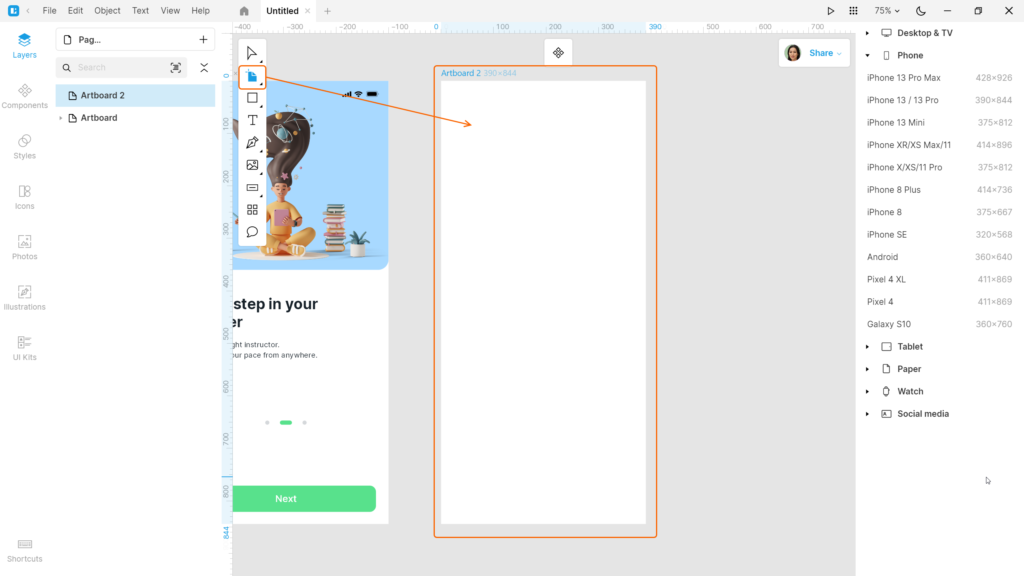
Add a rectangle: size 390*360px, fill #ABFFEB, and corner radius 20px for lower corners. Or simply copy the rectangle from the first artboard and recolor it. Create a new color variable (Ice Cold).
Don’t forget to add the status bar.
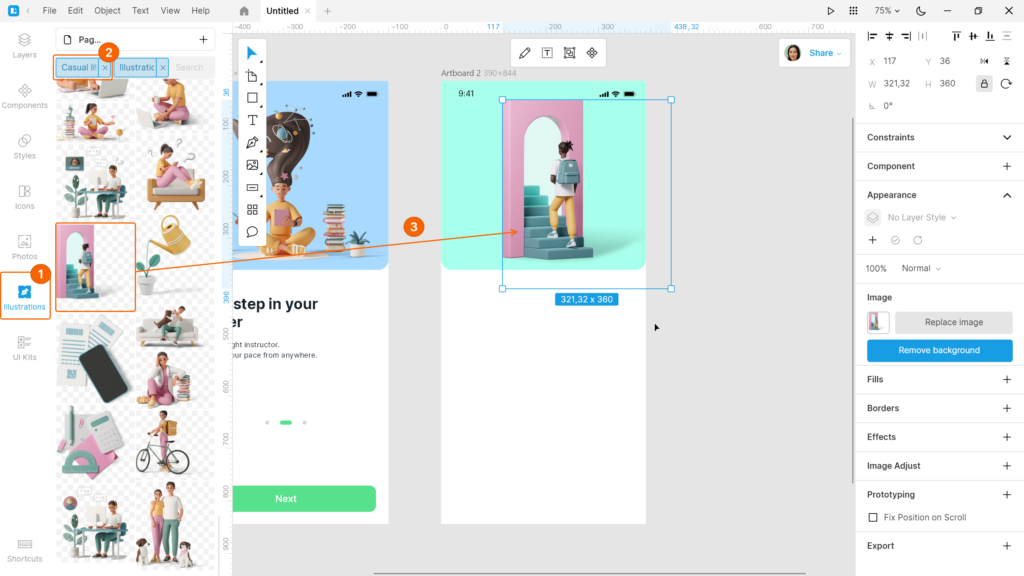
Add another illustration from the Illustrations tab and place it over the rectangle. I used an illustration from the same Casual life 3D pack.
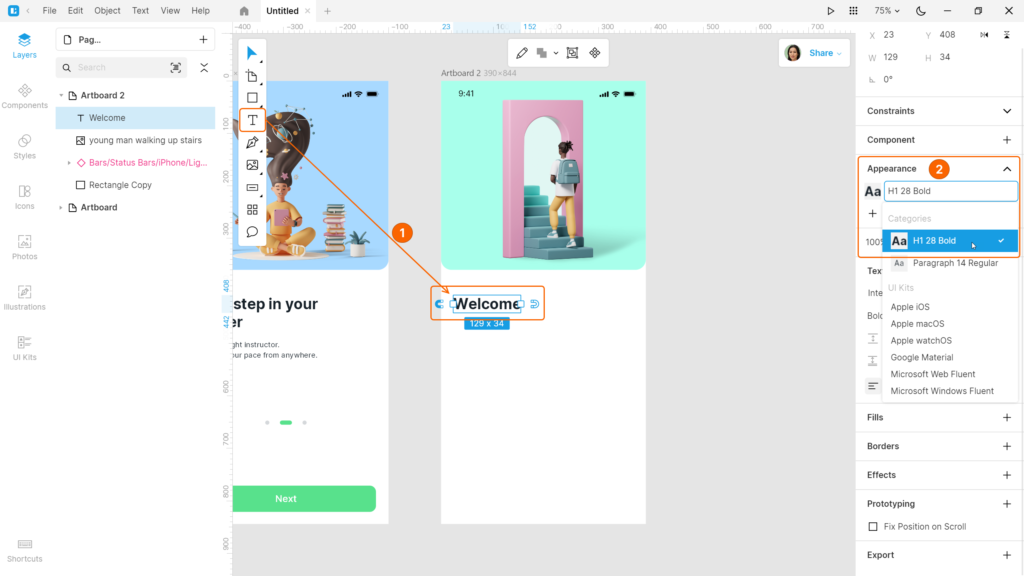
Create a text block under the rectangle. Apply the H1 28 Bold text style to it.
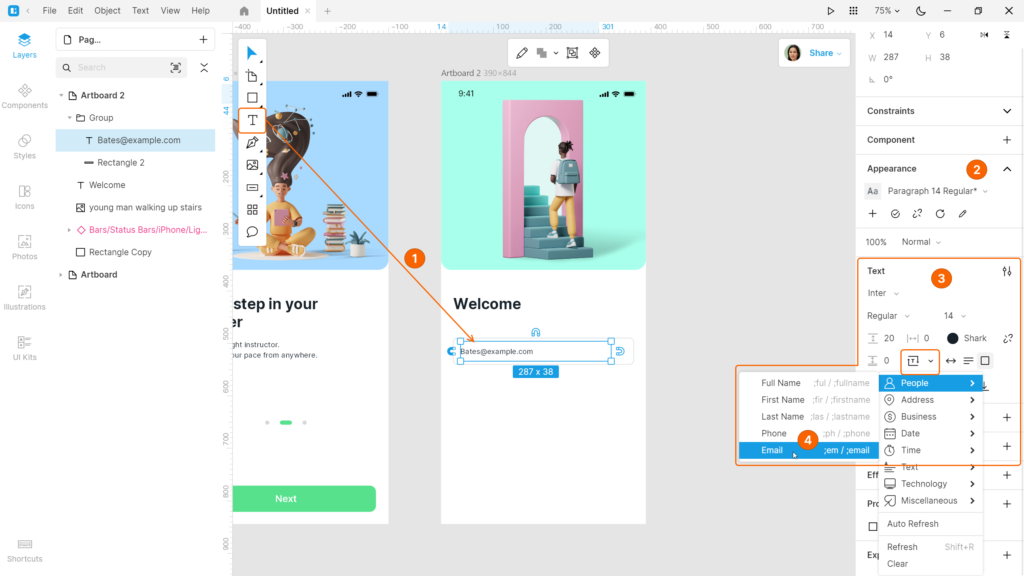
Create a rectangle with the following settings: size 344*50 px, corner radius 8. Add a border with color variable Iron, and delete the main fill.
Add a text block with the Paragraph 14 Regular text style and generate an email address using the Generate Text tool in text settings. An input field is ready.
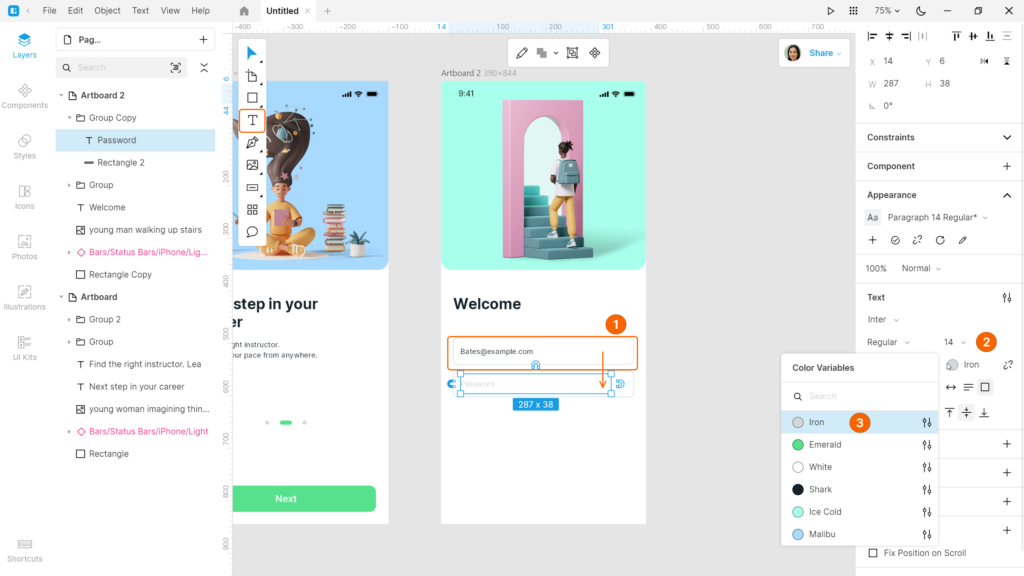
Duplicate the field. Edit the text and set its color to color variable Iron.
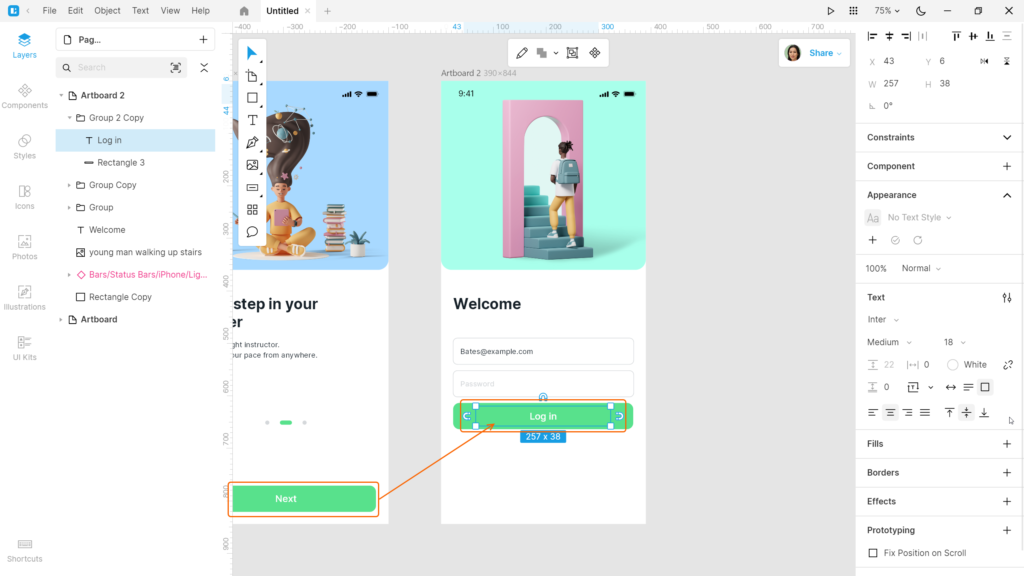
Duplicate the Next button from the first artboard. Rename it to Log in.
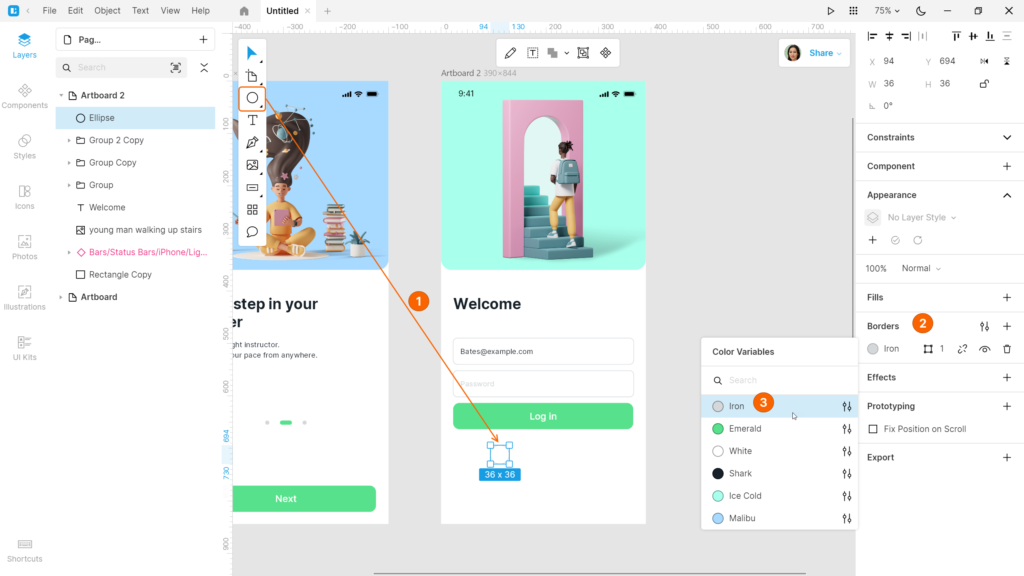
Create a 36*36 px circle. Delete the fill and add a border with color variable Iron.
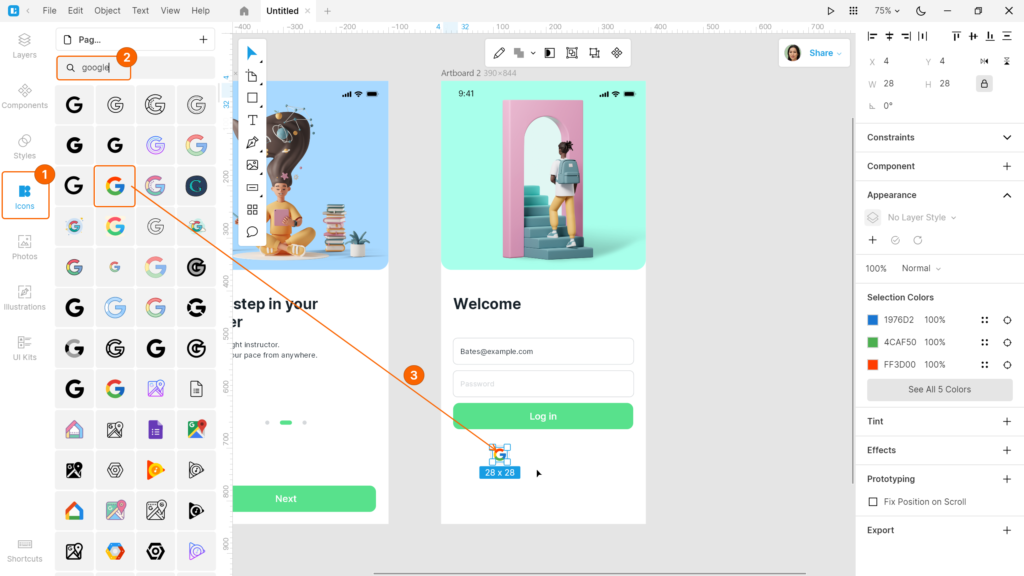
Open the Icons tab and find the Google icon. Fit it into the circle.
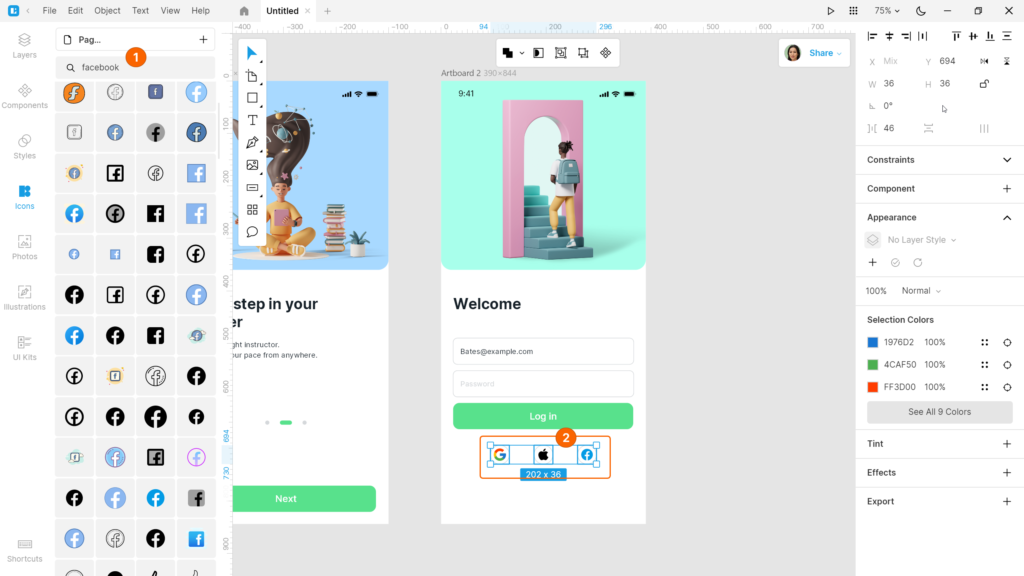
Create two duplicates and change the Google icon for other logos (Apple and Facebook) using the Icon tool.
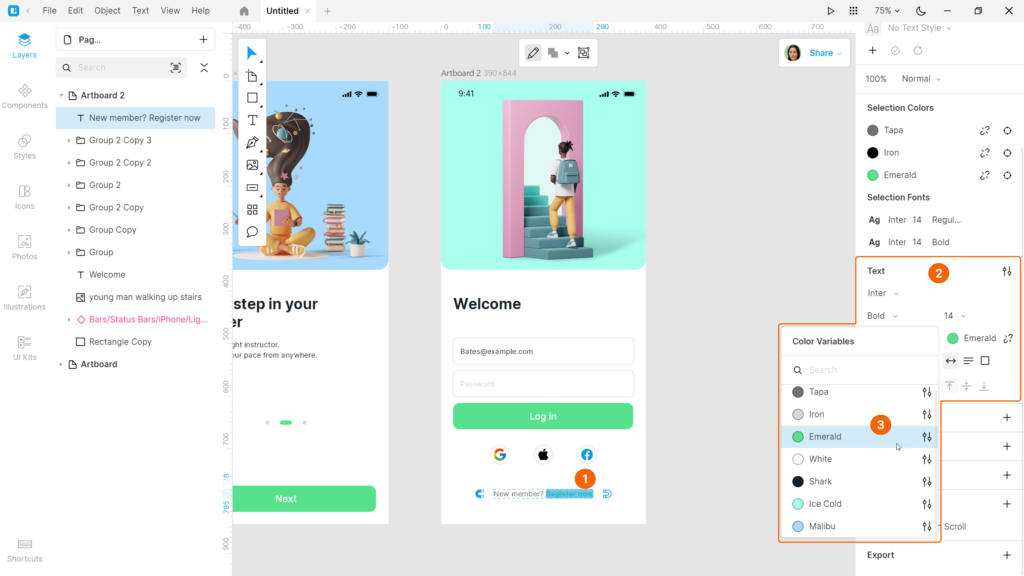
Add the last text block and adjust the text settings. The settings of the first part: Inter Regular, size 14, color #727272, color variable Tapa.

The settings of the second part: Inter Bold, size 14, color variable Emerald.
Make sure that all the layers are perfectly aligned.
The second view is ready.
Also, watch the video version of this tutorial.
Create your designs in Lunacy and share them with us on social media: Twitter, Facebook, and Discord.
Check out the other Lunacy tutorials:
Lunacy is a collaborative graphic editor with built-in graphics and handy AI-powered tools. Lunacy runs not only on Windows but also on macOS and Linux. Help us spread the word about Lunacy. Send your fellow designers and developers this link https://icons8.com/lunacy.
About the author: Julia G, a QA engineer at the Lunacy team, and Eugene S, a graphic designer at the Icons8 team.