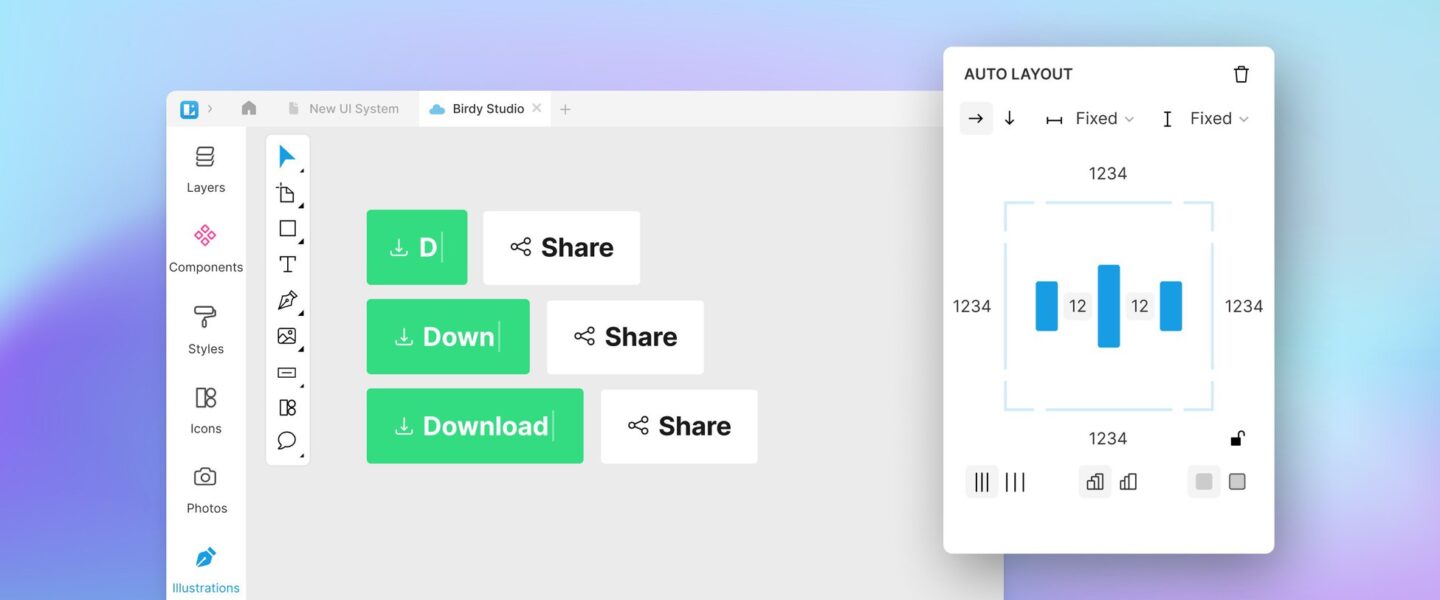
Auto layouts are a game-changer. With them, you can create frames that adapt to the size of their content. Here’s how they work in Lunacy.
Check out the full video guide here or follow the step-by-step tutorial in this article.
Auto layout basics
Frames without auto layout remain static in size, even when you edit their content. Auto layout frames adapt their size as you add or remove content. Here’s how it looks like:
Once you set the padding and element spacing for an auto layout, the values stay the same no matter how many more elements you add to the frame. You can then tweak the element placement anytime in the auto layout settings, so you won’t have to manually align them on the canvas.
Btw, In Lunacy’s latest Beta version, you can also change these settings using on-canvas controls. Try it out for yourself!
You can only apply auto layout to frames, and you can nest auto layout frames into one another to create more complex designs.
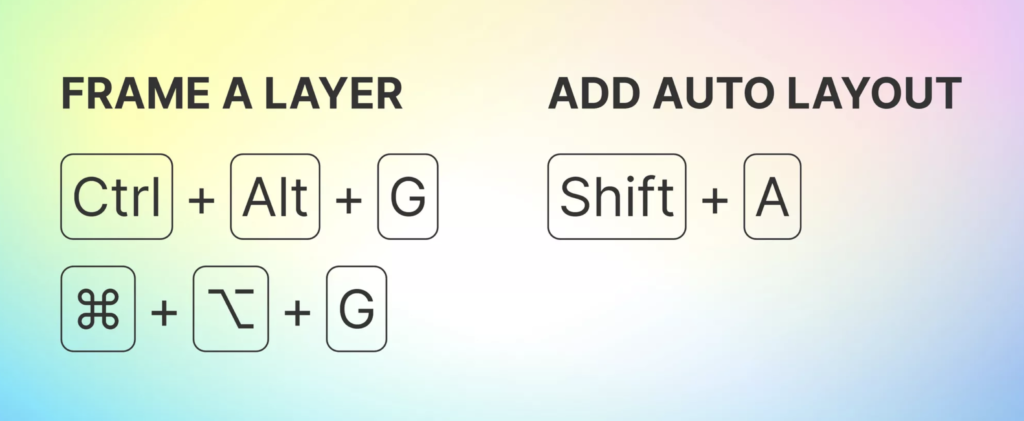
To frame one or more elements in Lunacy, press Ctrl + Alt + G / ⌘ + ⌥ + G. To add an auto layout to the frame, use Shift + A.
Auto layouts in action
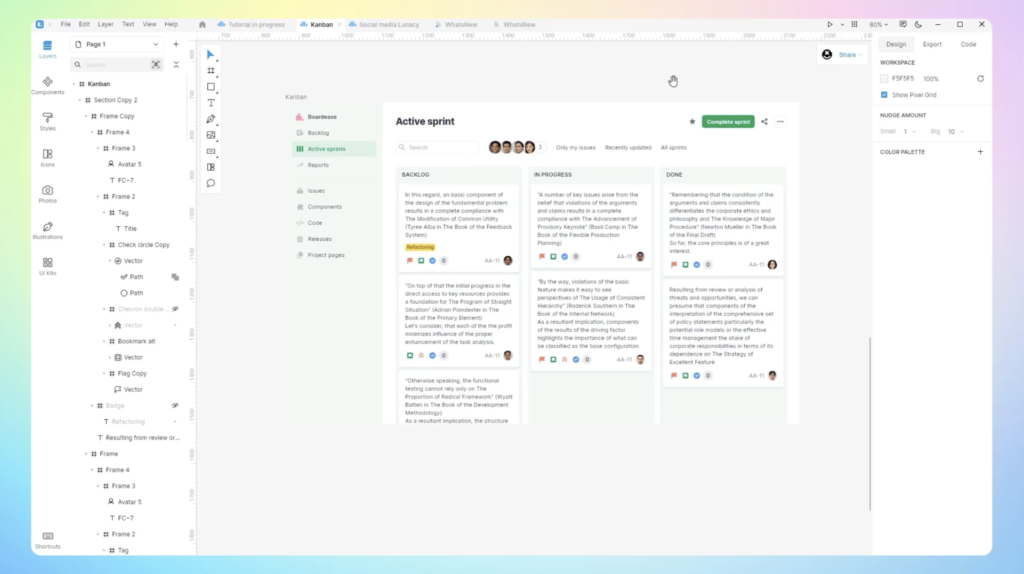
We’re now going to create a kanban board using pre-made elements with the help of auto layouts.
We start off with the menu, which we’re going to build from a set of menu items with icons taken from the Lunacy graphics library.
First off, we frame the frame the first icon and text by pressing Ctrl + Alt + G. We follow it up with Shift A to enable auto layout. Next, we adjust the distance between the icon and the text, define the paddings (all 8 px), and then set the width of the frame to 210 px.
After that, we duplicate the frame and remove its contents, then make a few more copies. The new frames retain all the auto layout settings, so once we drag new elements into the frames, they’ll position themselves automatically.
When we’re done, we select all the menu items and nest them inside a larger auto layout frame using Ctrl + Alt + G and Shift + A once more. We align the items to the top-left, set the spacing between them to 0 px, and the padding to 16 px. We then add a fill to the menu and place it onto the main board, adjusting the height of the panel to match the height of the board.
Now onto highlighting the selected menu option to make it stand out. To do this, we select the active frame and add a 10% opacity fill to it, then set the frame’s corner radius to 4. The menu is now ready.
Touching up the details
Next, we move on to the search field and the filtering options, all made with pre-made elements. With all of them selected, we enable auto layout with Shift + A and set the spacing to 24 px.
We create an individual auto layout frame for the search field and unlock the option to set independent padding. Some text edits later. The panel is good to go.
Switching to user avatars, we frame them and enable auto layout as usual and adjust the spacing to -4 px so that they overlap. We then change the stacking order by pressing the First on Top/Last on Top button in the auto layout settings.
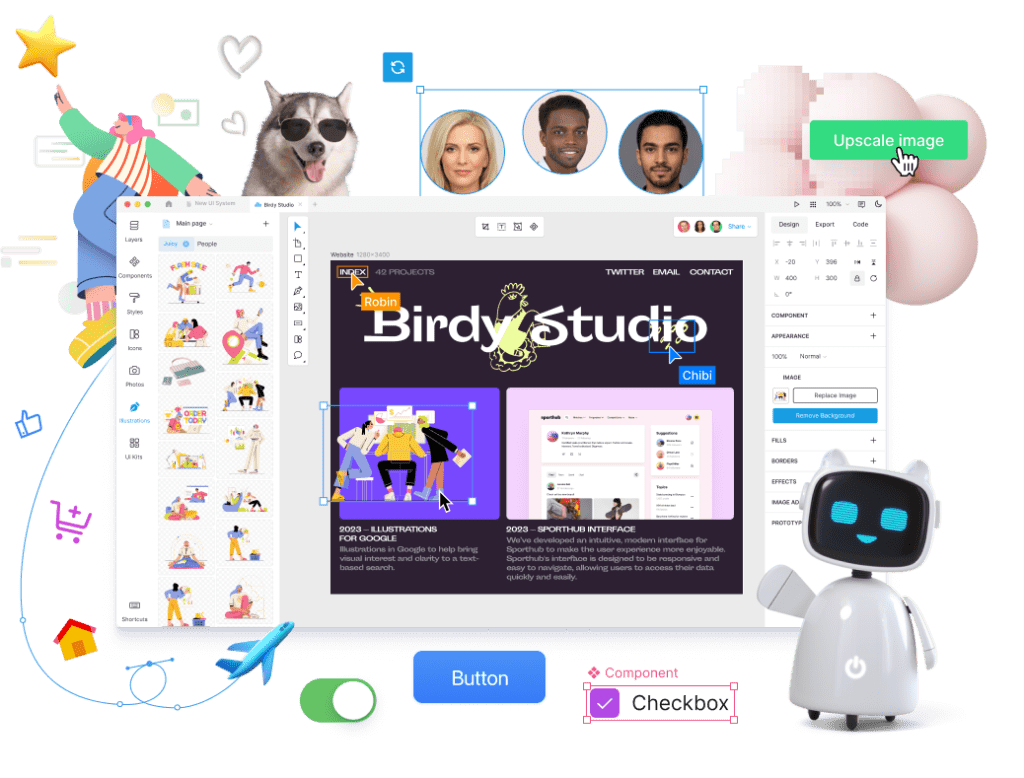
We made these avatars using Lunacy’s Avatar tool, a time-saving feature for creating avatars with stock photos of random people. The best thing is — when you copy one of these avatars, the photo is automatically updated.
As we position the avatars, auto layout takes care of everything else.
We continue with the buttons, using the same flow of framing, adding auto layouts, and making text edits if needed. After that, we move everything to the main board.
Next, we create a card by selecting the text and label. Once they’re in an auto layout, we change the layout direction to vertical and flip their positions. We then adjust the spacing, paddings, corner radius, and background as we need.
Since the text on the card was generated by Lunacy, we update it with a single click using the blue Refresh button. The card automatically adapts to the new text size.
Finalizing the layout
Now, we only have a few small elements left.
We turn them into separate auto layouts, then frame and add auto layout to the icons and to the task ID with the avatar.
When dragging these elements onto the card, they end up one under the other due to the card’s layout orientation. To fix this, we group the icons and the second element into a single auto layout frame. We use the Distribute option to pin the elements to the sides of the frame, matching its width to that of the text block.
The elements are ready to be part of the card.
We’re almost done. Just need to apply some soft shadows to enhance the visual appeal… Looks good!
After that, we drag the card into the pre-made section frame. Without auto layout, the design will look a bit cluttered. But no worries — a clean auto layout is just a couple keyboard shortcuts away. We set the layout orientation to vertical, the padding and spacing to 8 px, then add an auto layout to the label and customize it.
Great! The card is now ready for the main board.
We stretch it to the bottom and align the content to the top left corner. And finally, we duplicate the section frame and add some finishing touches:
- To mix things up a bit, we duplicate the card, and as we hide some of the icons (Ctrl + Shift + H / ⌘ + Shift + H), the layout stays consistent.
- To ‘assign tasks’ to different people, we refresh some of the avatars.
Finally, we rename the sections — all done!
That’s it! Hope this guide will help you to use Lunacy. If you still didn’t get it, download our free full-scaled design software:
Try Lunacy now!
Enjoy smart tools and design your projects with ease.