Have you ever wondered how your favorite video games were made? Monkey Island, Indiana Jones and the Fate of Atlantis, Full Throttle — how could they look so great even when the graphics were so pixelated? Old video game environments looked pixelated because available graphics technologies were limited. Nowadays, having a pixelated look is more a matter of choice.
Pixel Art is experiencing a comeback: many modern games are using this style to create a retro yet fresh look that stands out.
Here we will go through creating a unique environment in Pixel Art using Clip Studio Paint. This could be used as concept art for a video game or even as a final in-game illustration.
Get ready to paint those pixels!
Why Clip Studio Paint
Clip Studio Paint, originally called Manga Studio 5, is a photo editing software with features for digital painting, illustration, and especially creating manga and comics.
Clip Studio Paint is a well-rounded tool for artists with a built-in library of materials and assets:
- A powerful brush engine with a stabilizer
- Lots of built-in watercolors, oil, pencil, and marker brushes
- Gradient maps and layer blending modes
- Non-destructive tonal adjustment layers
- Advanced features like AI coloring and perspective grid
Clip Studio Paint works great for Pixel Art pieces like this one because it has all the tools you need for the job:
- Perspective rulers to make your illustrations look realistic
- 3D models that you can pose and customize to create perfect figures with perfect anatomy and posture
- An AI coloring mode that will color a picture for you in a few brushstrokes (in development)
- A smart fill bucket tool that will close the gaps in your line art automatically
- An innovative vector pen tool that looks like a natural pencil
It is a powerful tool like Photoshop but more intuitive and easier to learn. It works on Android tablets and smartphones. One important point to note is that Clip Studio Paint can open Photoshop files.
Clip Studio has a great price, which is much cheaper than Photoshop:
- Around $50 for Clip Studio Paint Pro (single payment and lifetime access)
- Around $220 for Clip Studio Paint Ex with extra features for animation, comics, and manga (single payment and lifetime access)
Still, wondering whether you should be using Clip Studio Paint or Photoshop? Read this Clip Studio Paint Pro/Ex review.
Setting up Clip Studio Paint for Pixel Art (doc size, hard-edges settings, etc.)
Before we start, we need to set up Clip Studio Paint for doing Pixel Art. We will use Clip Studio Paint Ex in this tutorial, but all steps are the same for Clip Studio Paint Pro.
1. Canvas size
Create a new illustration and set the canvas size to 256 x 128 pixels, 72 dpi resolution. This piece will have a 2:1 aspect ratio.
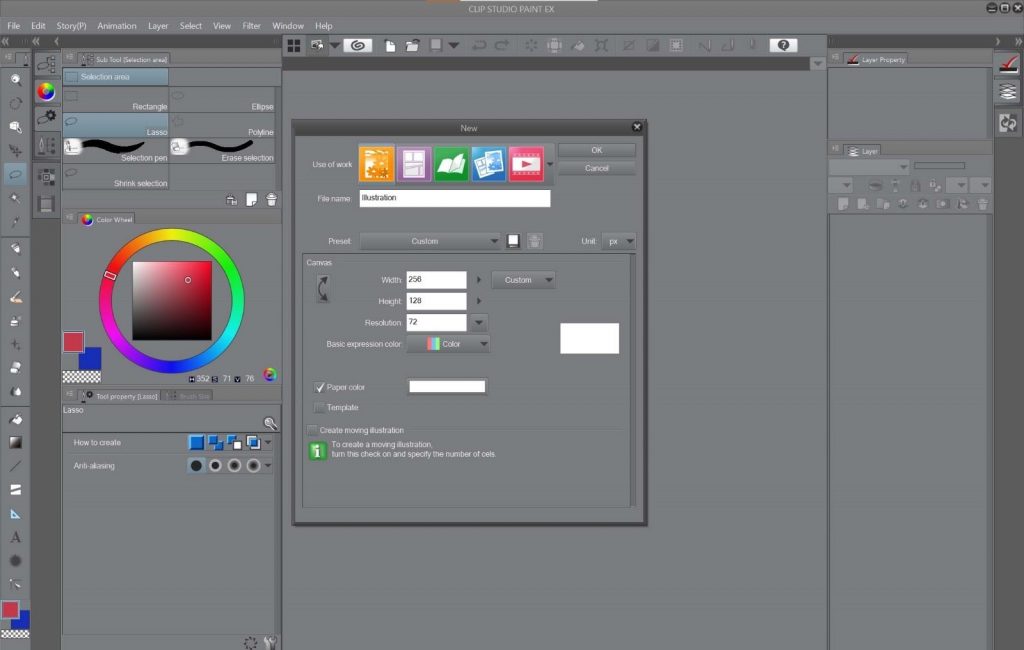
Pixel Art image resolution can vary from higher resolution images such as 600 x 400 px down to much smaller pieces. For this piece, we will use 256 x 128 as it gives a good retro feel and still allows us to show quite a bit of detail on our environment.
2. Grid size
Set the grid size to 1 x 1 px. This will come in handy when you have to zoom in into details during the polish phase.
Go to View > Grid Settings. Under Settings of the grid, set the gap and number of divisions to 1 pixel each.
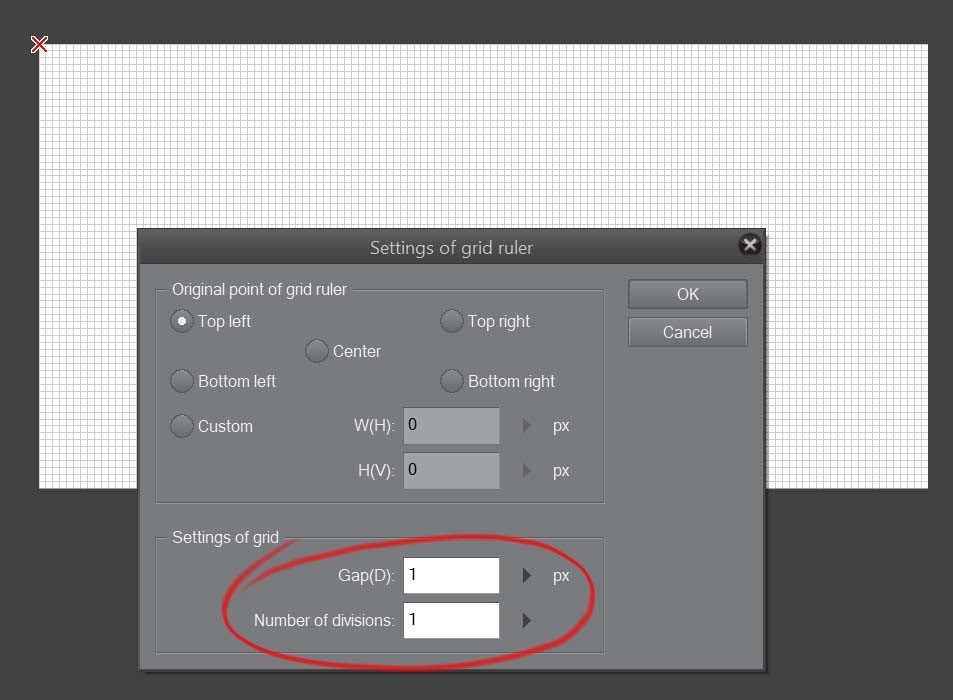
You can toggle the grid on or off by going to View > Grid.
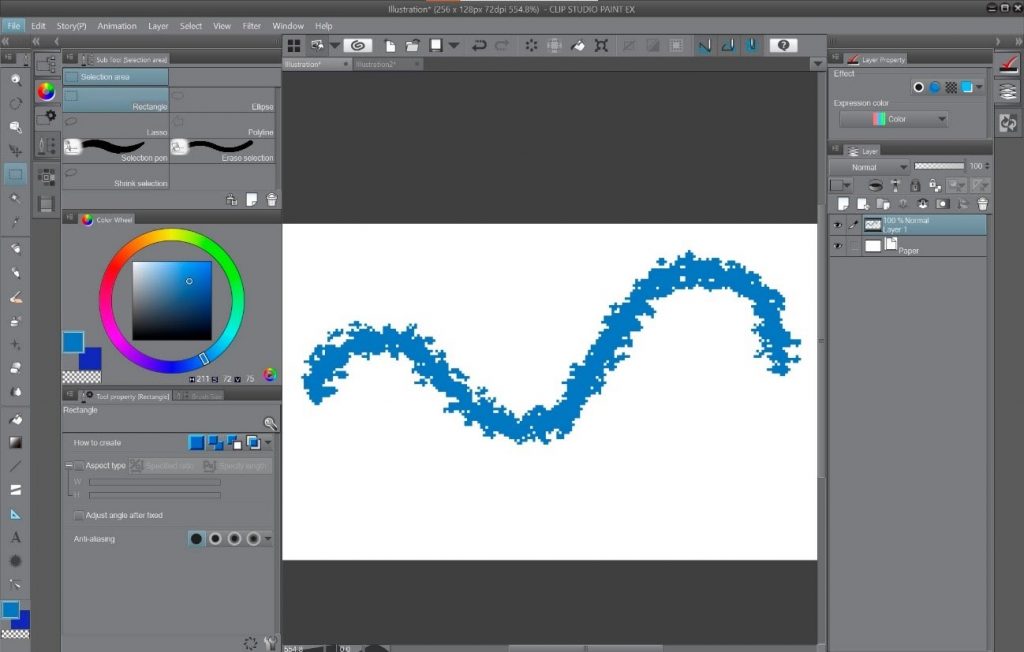
3. Сustomize the brush
The next step is to customize the brush. We need a brush with hard edges and no anti-aliasing. This is necessary so that you can control the color of each pixel you draw.
To do this, in the Pen Sub Tool panel, under the markers section, choose the fill-in mono pen. Then make sure that anti-aliasing is disabled on this Sub Tool.
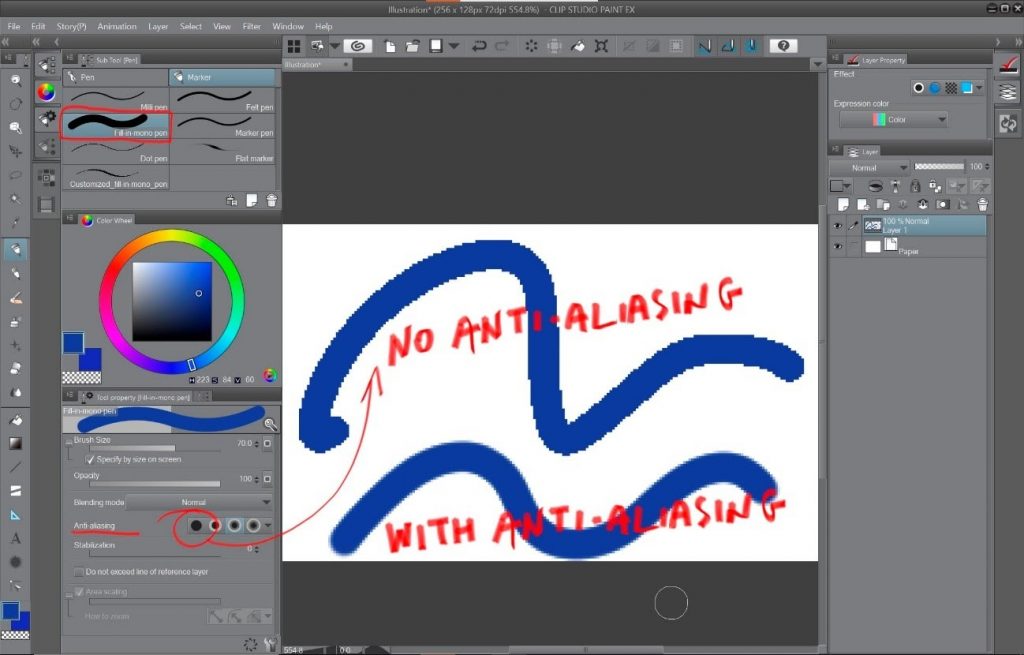
There are no hard and fast rules for anti-aliasing and brushes in Pixel Art. Color gradations and soft edges are by no means forbidden. It all depends on what type of piece you are painting and what look you are trying to achieve.
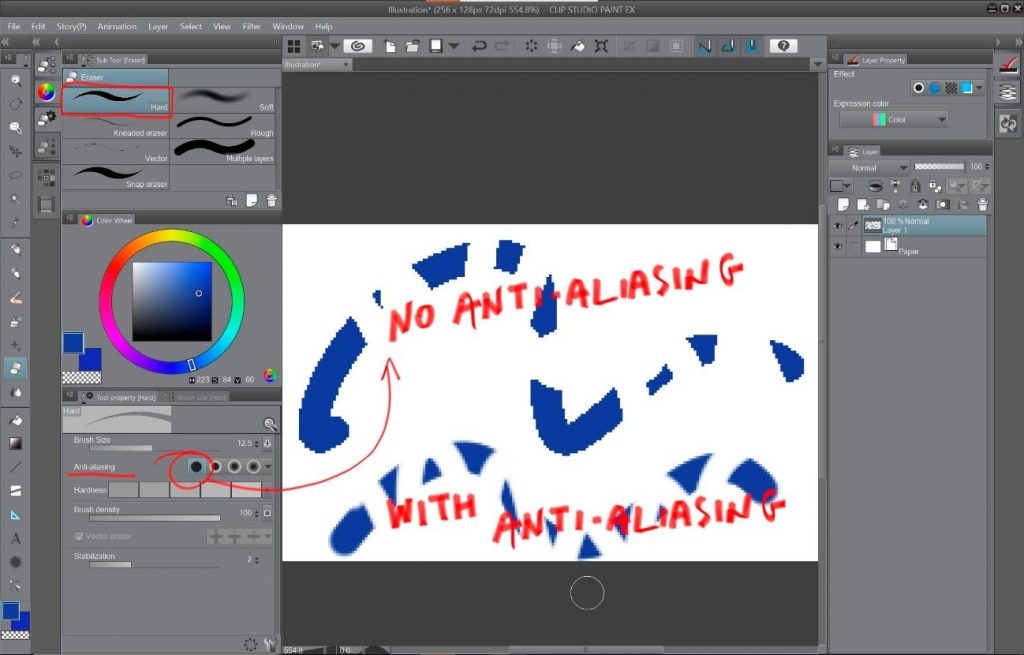
4. Set up the eraser
Now let’s set up the eraser. The standard eraser won’t work because it does not erase pixels straight away. So we need a 100% hard eraser.
To do this, just choose the “hard eraser” and make sure it has anti-aliasing turned off.
5. Custom organic textured brush
Now we will create a custom organic textured brush for some specific areas of our pixel art painting.
To do this, create a new document with a size of approximately 200 x 200 pixels, and then just paint an organic texture shape on it. Also, you can paste a texture taken from somewhere.
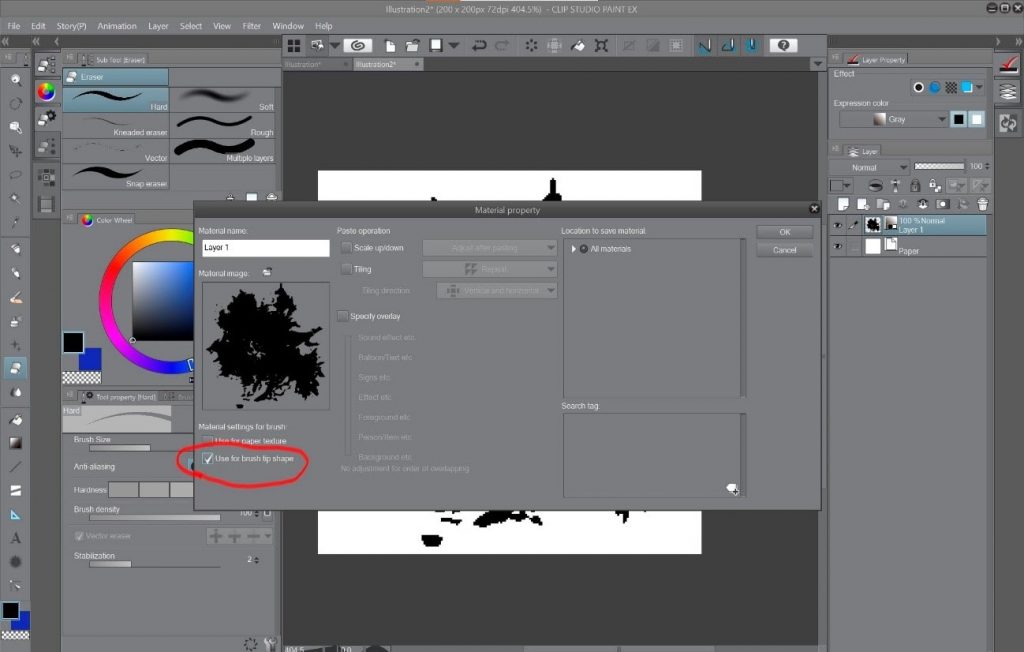
Set expression mode to “Gray” on the layer properties panel. This is important for the custom brush to work as expected. Then go to Edit > Register as material > Image.
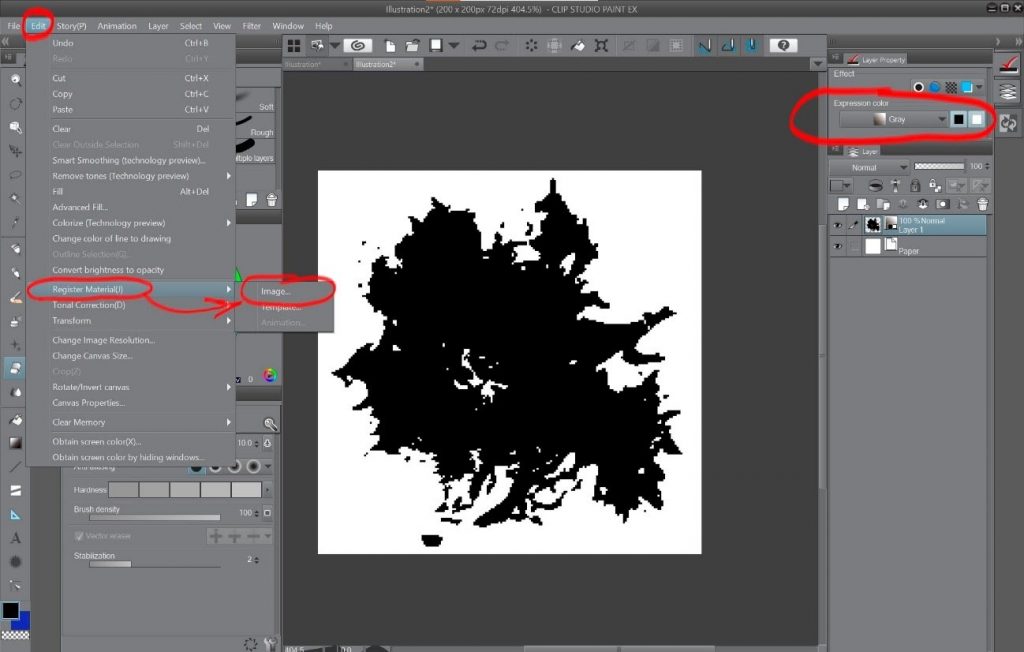
In the Material Properties pop-up dialog box, check the Use for Brush Tip Shape option. Then click OK to save this texture as a material in the Material Library.
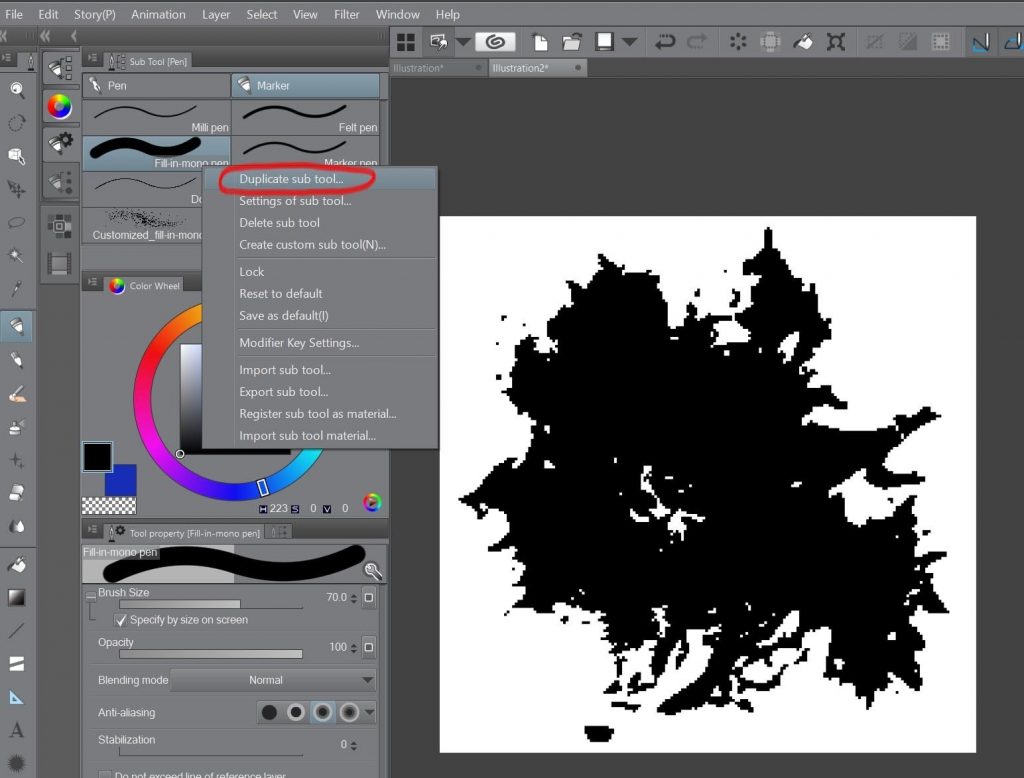
Once you have done this, go to your Pen Sub Tool panel again, choose your fill-in mono pen. Then right-click on it, choose “duplicate sub tool,” and give it a name.
Now, on the newly created sub-tool, edit its parameters by clicking on the small wrench icon at the bottom of the panel. Then on the Sub Tool Detail panel, go to Brush Tip, choose Material as the Tip shape and click on “add brush tip shape.”
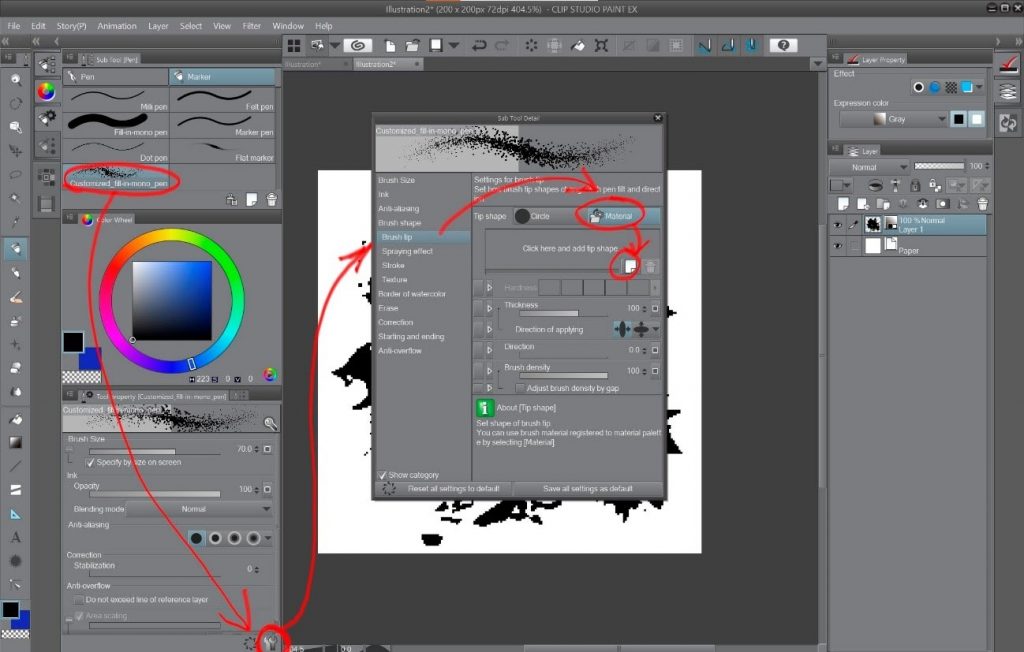
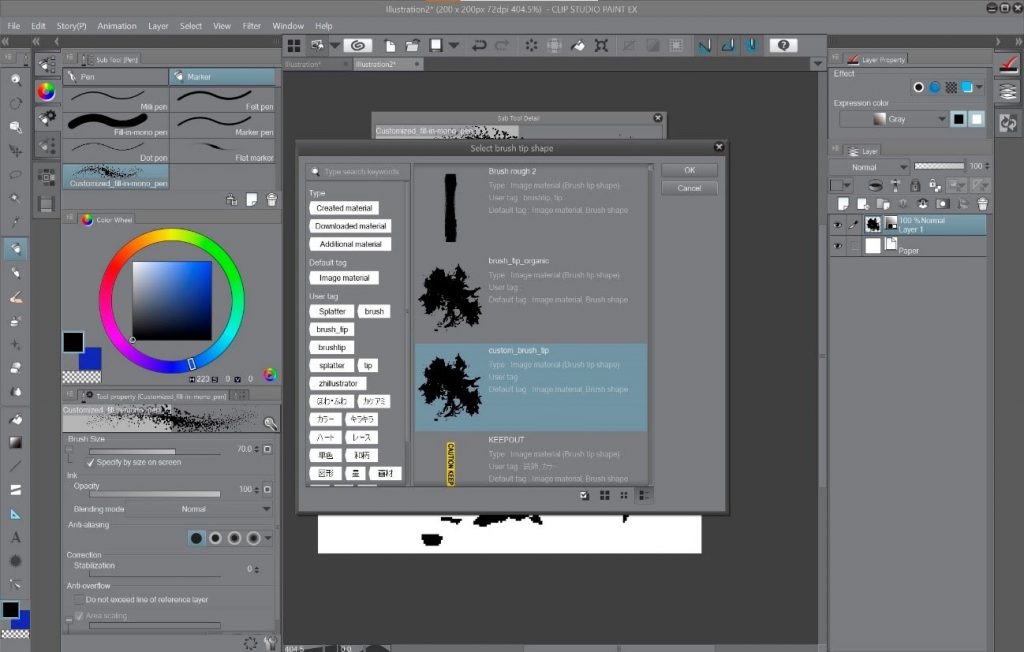
Now you just have to choose the material you have just registered and assign that to be used as the tip of your new brush.
On the Sub Tool Detail panel, you can adjust the spray properties of your brush to your liking. The goal is to create something that will look a bit random and organic to use in our Pixel Art environment to create foliage, rocks, terrain, etc.
Now you are ready to test out your custom brush.
6. Prepare selection tools
As a final step, prepare your selection tools. Set the lasso, polyline, and pen selection tools to “no anti-aliasing.”
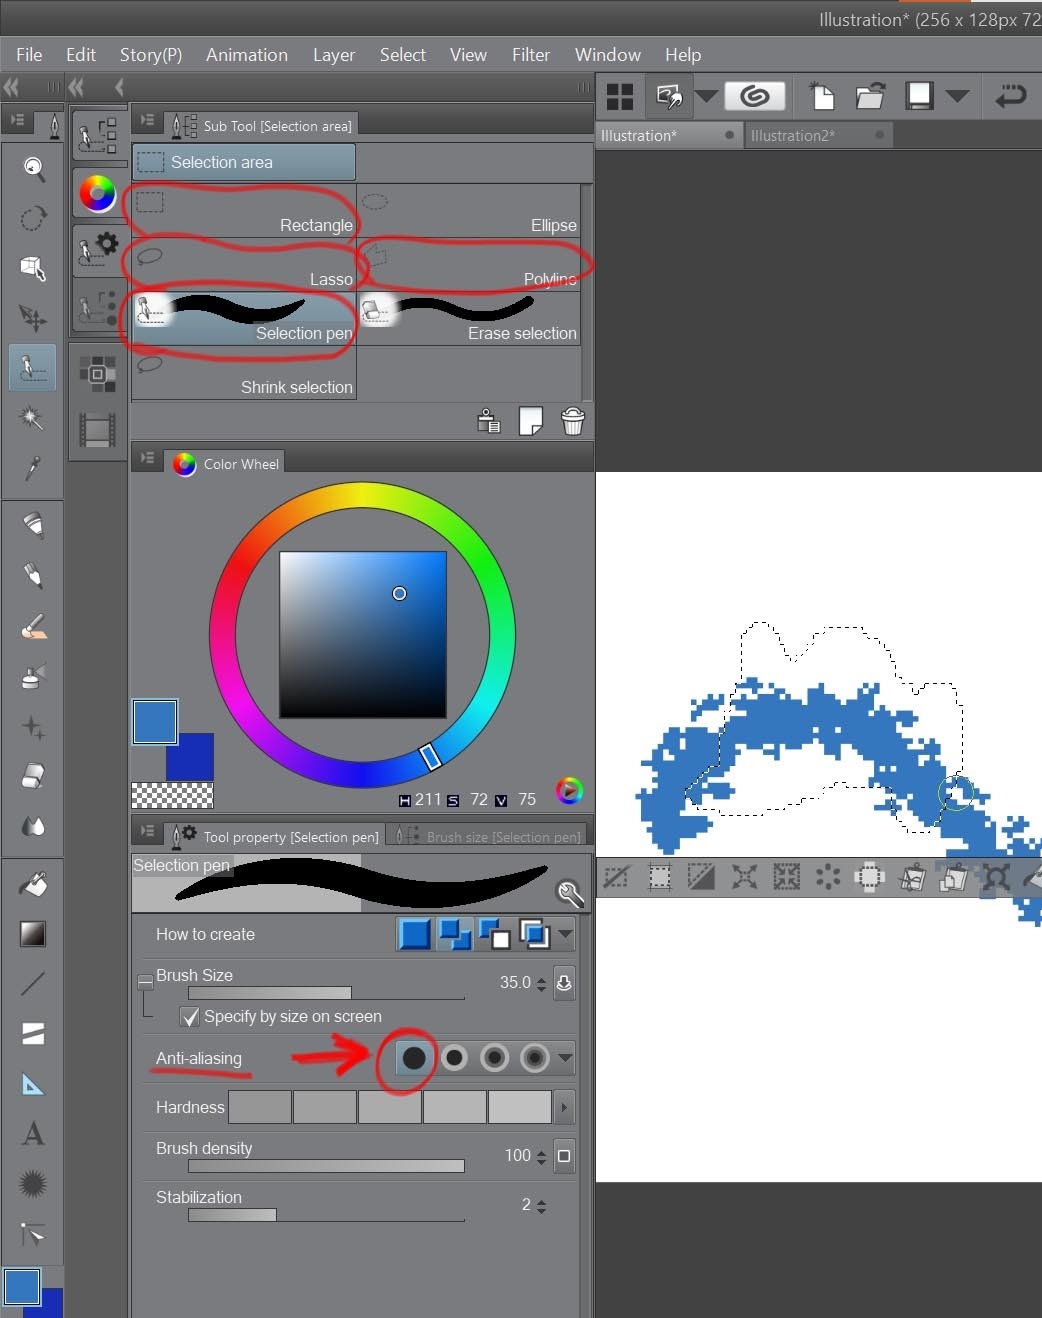
Now you have completed your setup of Clip Studio Paint for Pixel Art. You are now ready to create your Pixel Art environment!
Choosing the Color palette
Once we have done all the preliminary setup, it’s time to work on the actual piece. Here I am going to suggest starting with planning your color palette. This is important for any piece, but a consistent color palette is more important for a successful Pixel Art piece.
Pixel Art, by definition, has a very distinct look (the retro look). In the old times, colors were limited by video devices (whether it was EGA, VGA, etc.). For example, EGA had 16 colors, and the default VGA color palette had 256 colors.
A limited color palette will also help us give our piece a more balanced & cohesive feel.
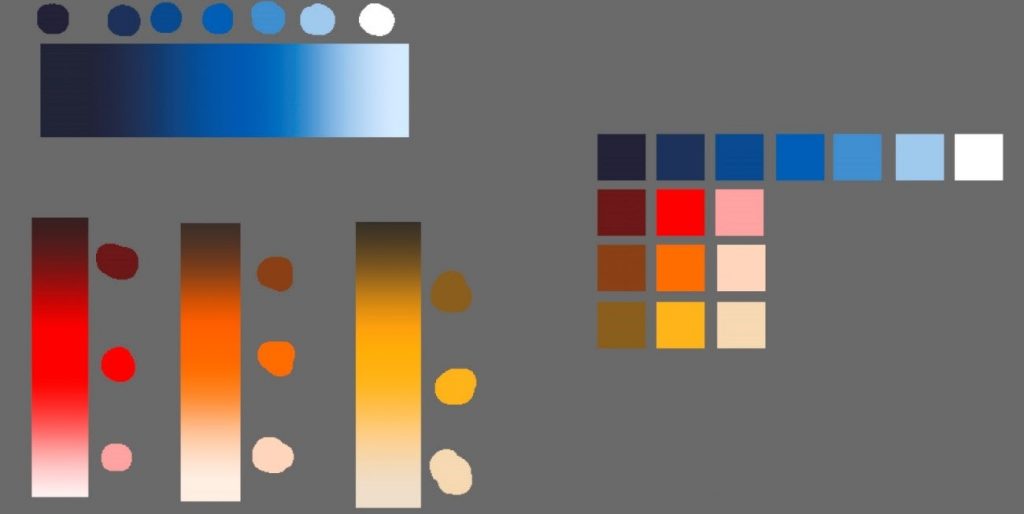
So, we are going to use a dual, warm-cool palette. You will not be using the full range of colors in the gradient, but you will instead stick to some individual swatches.
To visualize this, we made for gradients in Clip Studio Paint: Blue, red, orange, yellow. Each gradient goes from the darkest to the lightest shade of each color. From each gradient, we sample a few colors. For example, we will sample three red, orange, yellow tones and seven blue tones. With those colors, we can build color swatches for our initial palette 16 color palette.
As mentioned before, it is not a hard rule but rather a guideline for your composition. But we will not necessarily stick to these guidelines in the later stages when we add detail and subtle color variations.
Doing the first sketch
With the tools that we have prepared so far, we can start to paint our sketch.
This should be simple, emphasizing composition, light, and shapes. We should keep our composition quite monochromatic and limited to around 3 or 4 light values at the beginning.
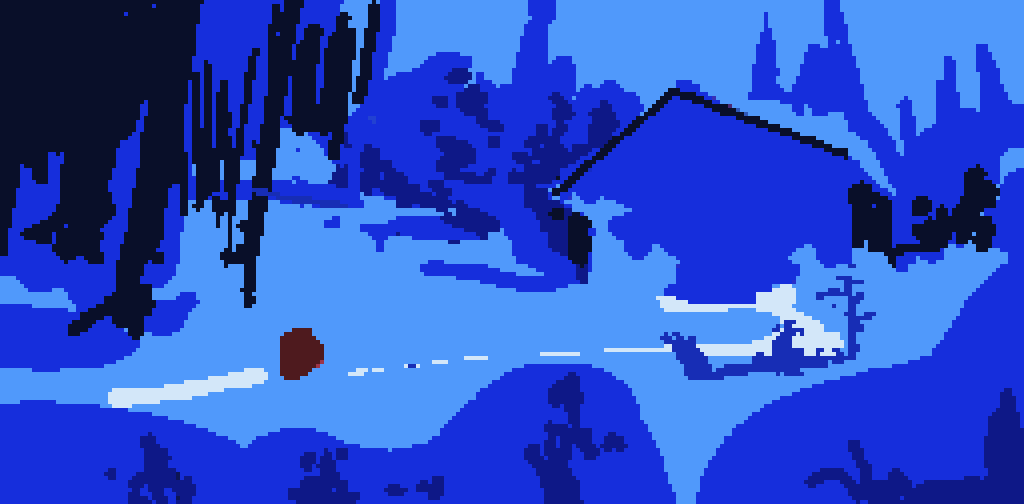
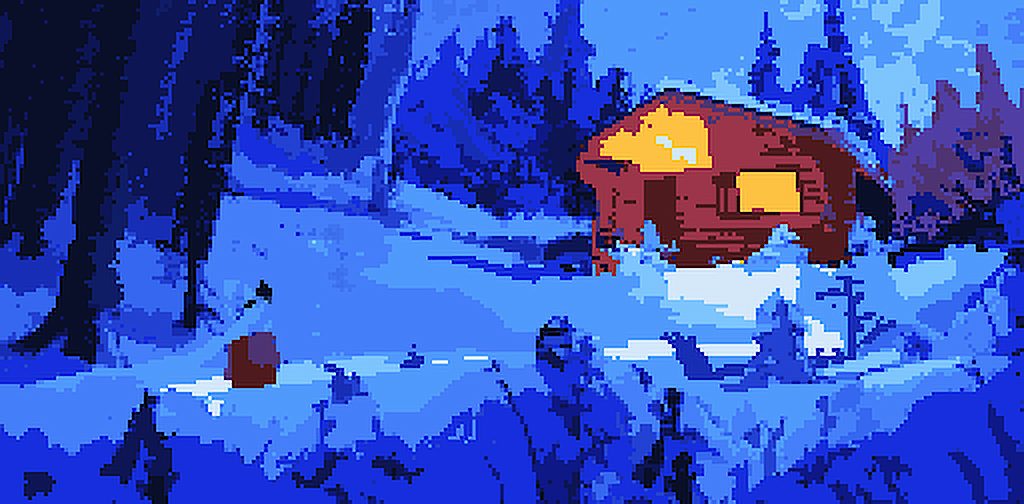
We will create a landscape in the snow, so we will use the cold colors in our palette to create our first sketch.
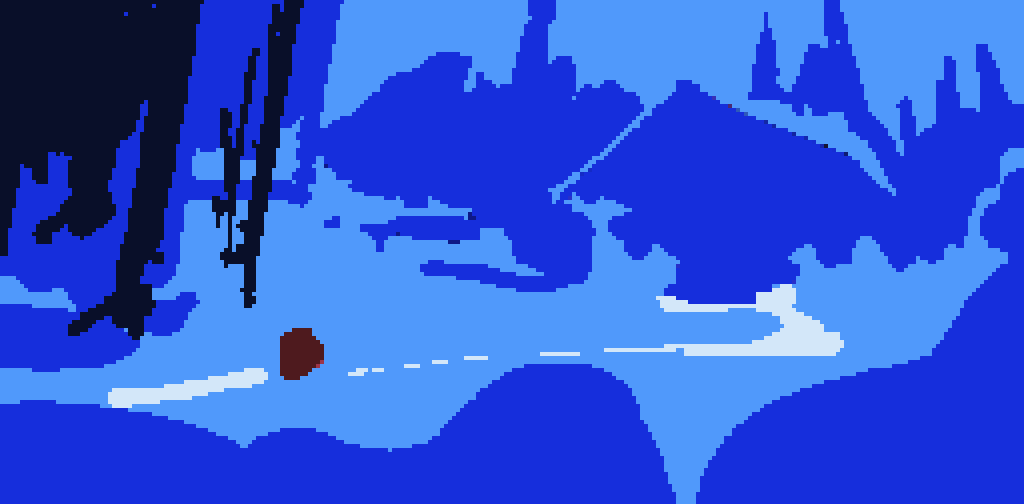
Notice how we have done an elementary structure sketch, using the fill-in-mono pen brush, with hard pixel edges and nothing but four light values.
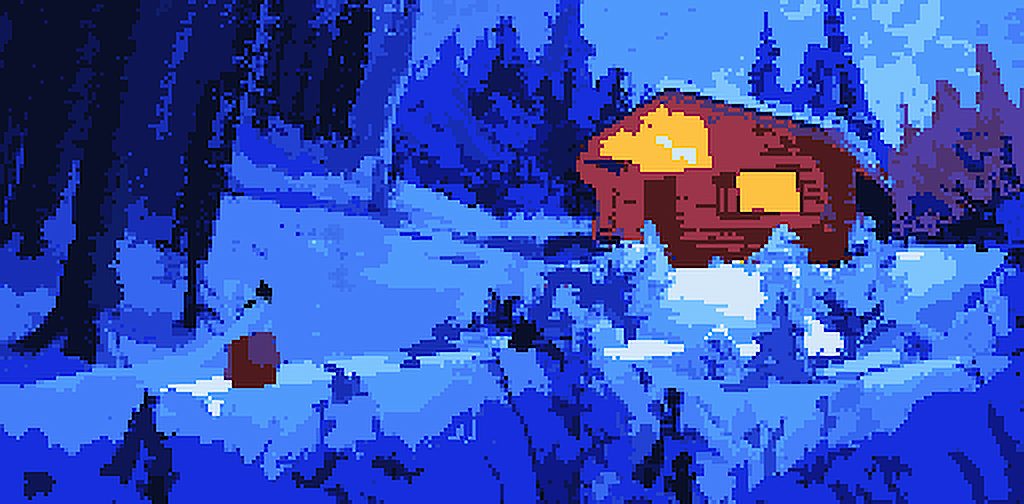
After this, we carve out some details on our sketch, still keeping it simple and blocky.
We keep adding details and depth to different areas of our sketch.
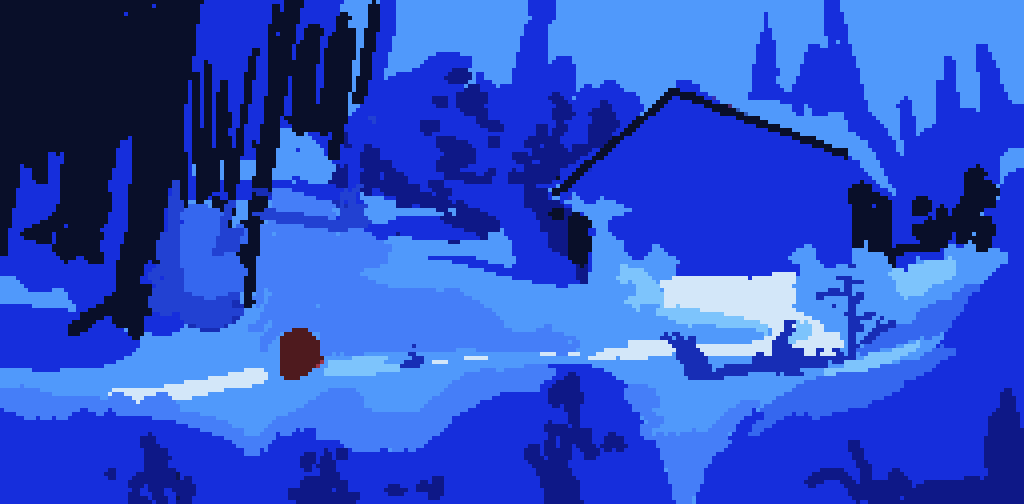
Now we start to add warm color areas — still very rough and flat colors.
We will have two main focus points: the house in the upper right third and the traveler character in the lower left third. These areas will get attention because they will have warm colors contrast with the cool colors of the rest of the environment.
Refining your Pixel Art environment
Once we have the first sketch, we gradually polish it and add detail to different areas. It is good to move from one place to another and not spend a lot of time on each one. This way, we avoid having one area overworked while other spaces remain too rough.
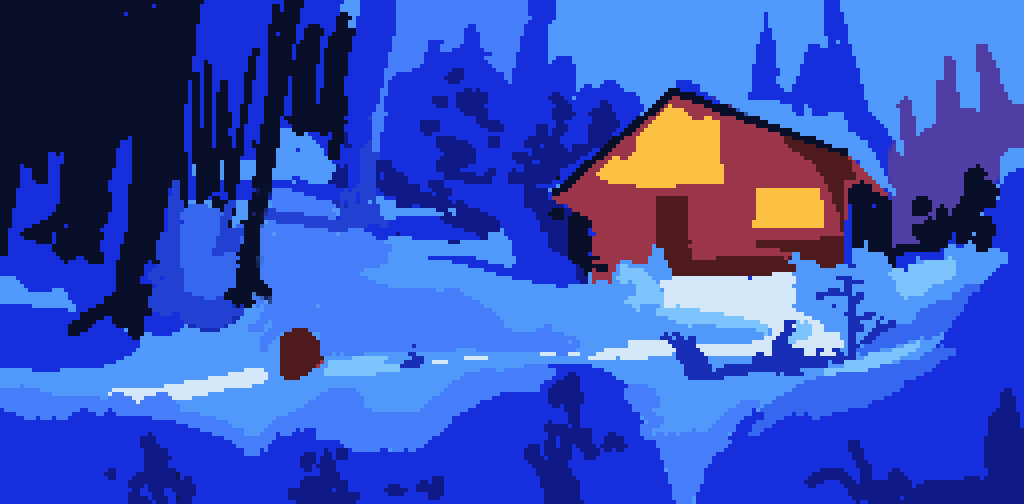
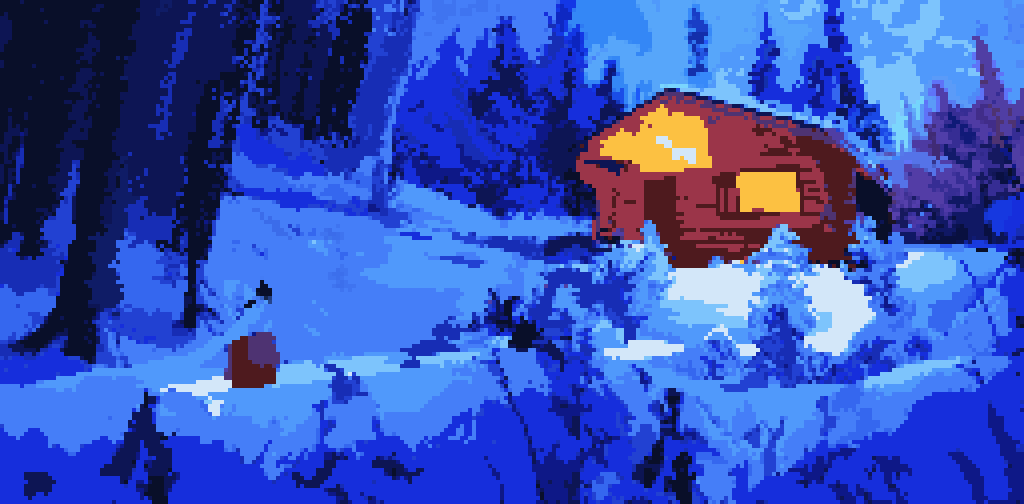
We start by adding some detail to our house and foreground:

We keep adding details to the house, backside trees, etc.
Next, we add details to the center back and left trees. Here, we use our previously created “organic textured” custom pixel brush to give those areas an organic feel.
Now we keep adding detail with our organic custom brush on foreground and midground plane bushes.
Notice how our image starts to get closer to a finished painting. We keep going around our image, adding details with our organic brush, adding foliage, organic shapes on the ground, and working on the sky in the background.
At this point, it’s time to work on our house a bit more. We add richer reds, oranges, and yellows details on the cabin’s wood, door, windows, etc. Here we are not following a limited color palette, but we add intermediate color shades that add depth, texture, and character to key elements in our scenario.
A bit more detailed work on the house, snow, and the sky.
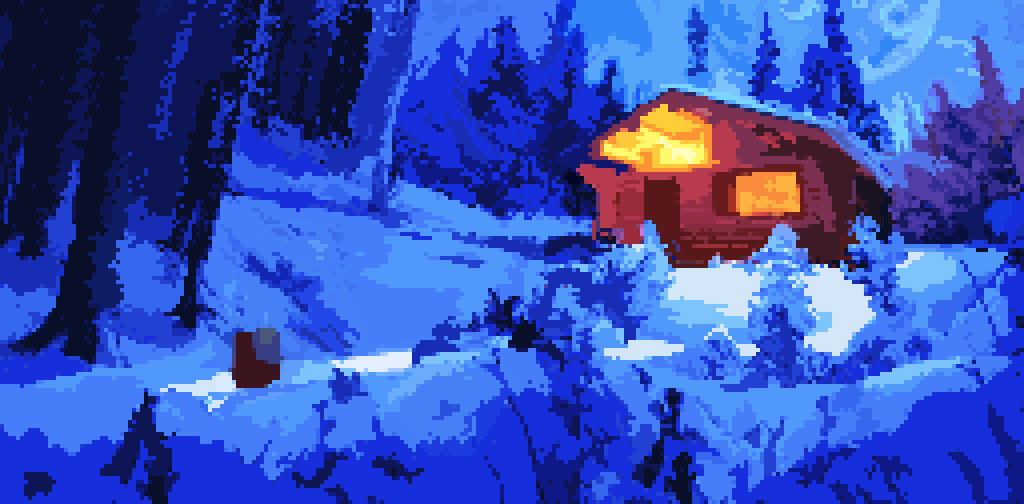
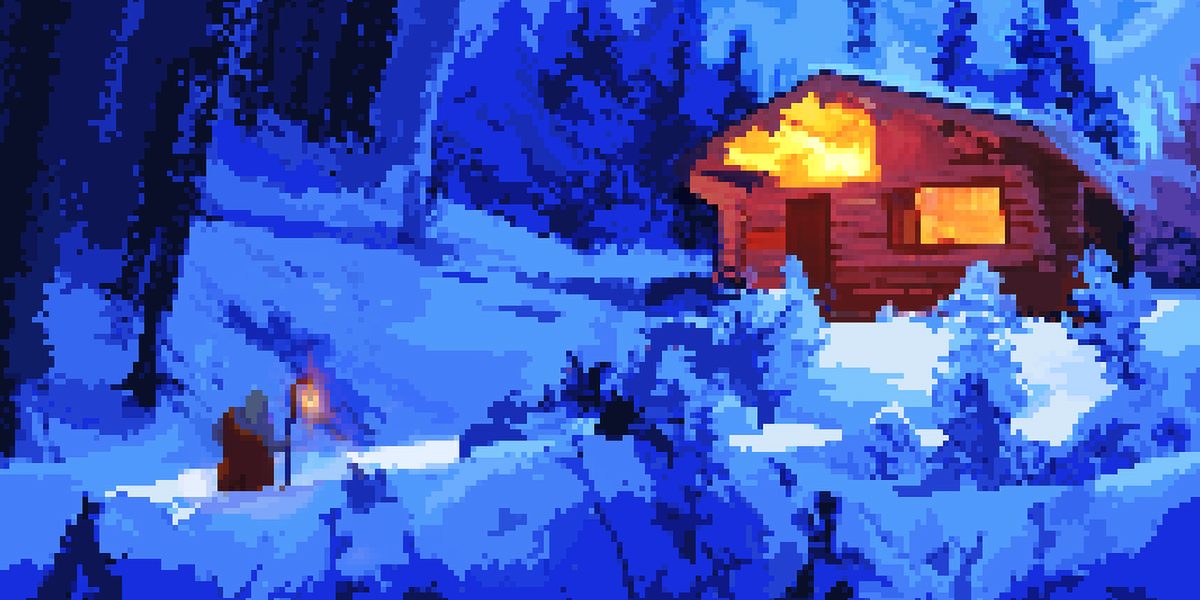
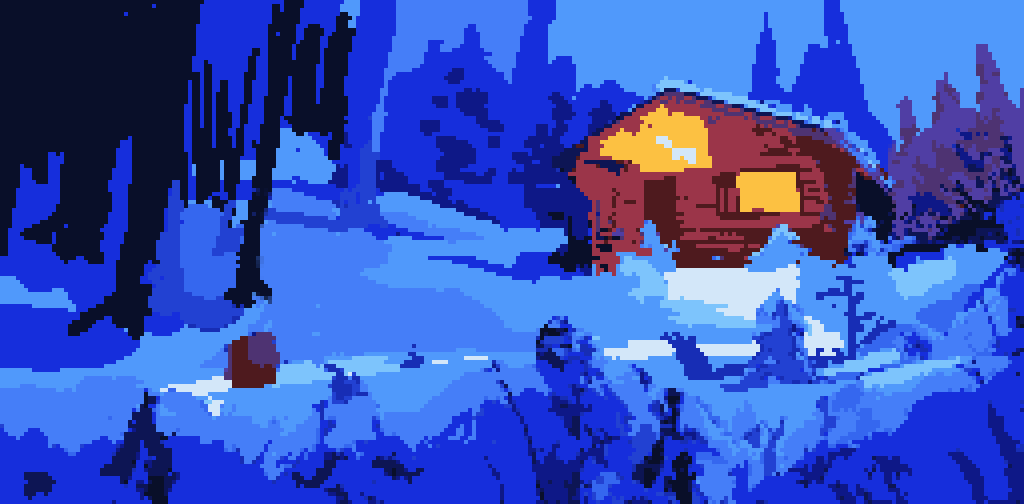
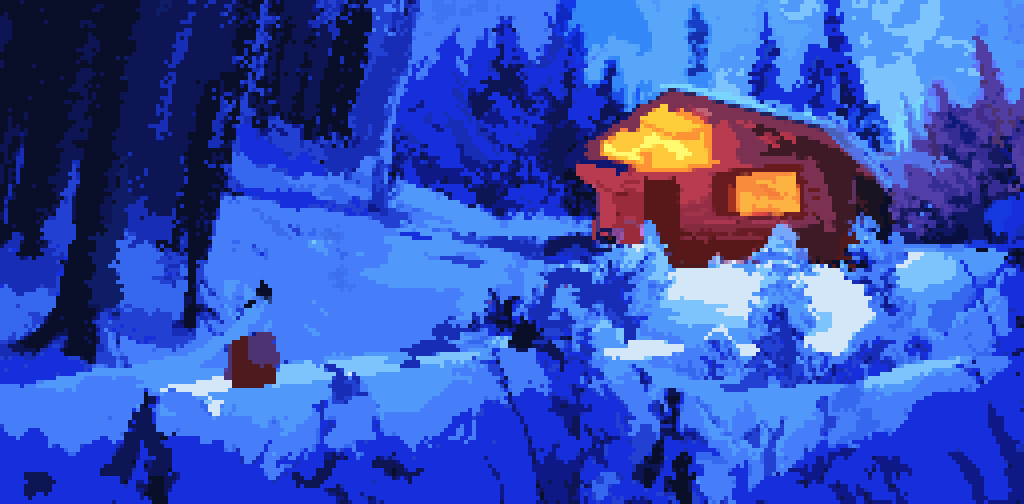
Finally, we add the character carrying candlelight in the foreground, and we do some final polish on the house and other areas.

For the candlelight carried by the character, we used layer blending modes such as a screen to get that transparency and glow of the firelight.
Final result: Pixel Art environment done in Clip Studio Paint
The final image that we have crafted.
By creating this piece, you have probably noticed how we went from very sharp and rough edges at the sketching phase and gradually increased the complexity by using more subtle, soft edges and layer blending modes as the composition progressed. Going from simple to complex is the key to creating a solid Pixel Art environment that looks good.
Conclusion and final thoughts
In today’s world of high-resolution 3D graphics, retro visual styles resembling those in the ’80s and 90’s video games are getting a lot of attention. Pixel Art has the potential to create a stunning visual effect that will stand out and look amazing in a videogame or as a finished art piece.
The techniques used in this example work for graphics such as isometric pixel art, top-down environments, characters, and 2D backgrounds for Metroidvania-style platform games. The fundamentals are the same across all these use cases: it’s all about using the right pixel-accurate brushes, controlling the hard edges on your piece, avoiding anti-aliased brush strokes, and keeping your color palette constrained to mimic those color-limited EGA or VGA graphics.
Here are some more examples of projects done with this technique:


Going back in time to create low-resolution images like this can be a challenging yet fun experience. You can learn a great deal by making an illustration with such limitations of color and resolution.
Now it’s your turn to try this technique. Vision new worlds can you create in 2D with just pixels? The sky’s the limit!